 article
No editing software: cutting a reel with Claude Code and Remotion, step by step
This week everyone on X is making motion graphics from code with Opus 5.5. Today I used the same thing to edit three of my reels. No editing software, no image or video model; just Claude Code and Remotion.
Most of the demos I see are standalone animations: a logo intro, a product showcase, a chart. Nice, but what I need every day is something else. I talk to the camera, and that talk has to be cut, subtitled, and have the right visual placed on top. So for me motion graphics aren’t a product on their own; they’re part of an edit.
Below I wrote down, step by step, how I set up this edit. Under every step there’s a tip I learned by trial and error. All the examples come from reels I published today.
1. WHY REMOTION WORKS: VIDEO IS NOW CODE
Remotion lets you write video in React code. Every frame is drawn like a web page, then turned into an MP4. Because an agent can write code, it can write video too: cards, counters, charts, subtitles, transitions. That’s the reason for the trend on X: you can give Opus 5.5 a single prompt and get a rendered motion graphic.
Remotion’s source code is open. It’s free for individuals and companies of up to 3 people, commercial use included; companies of 4 or more people buy a paid license. Rendering runs on your own computer and costs no credits.
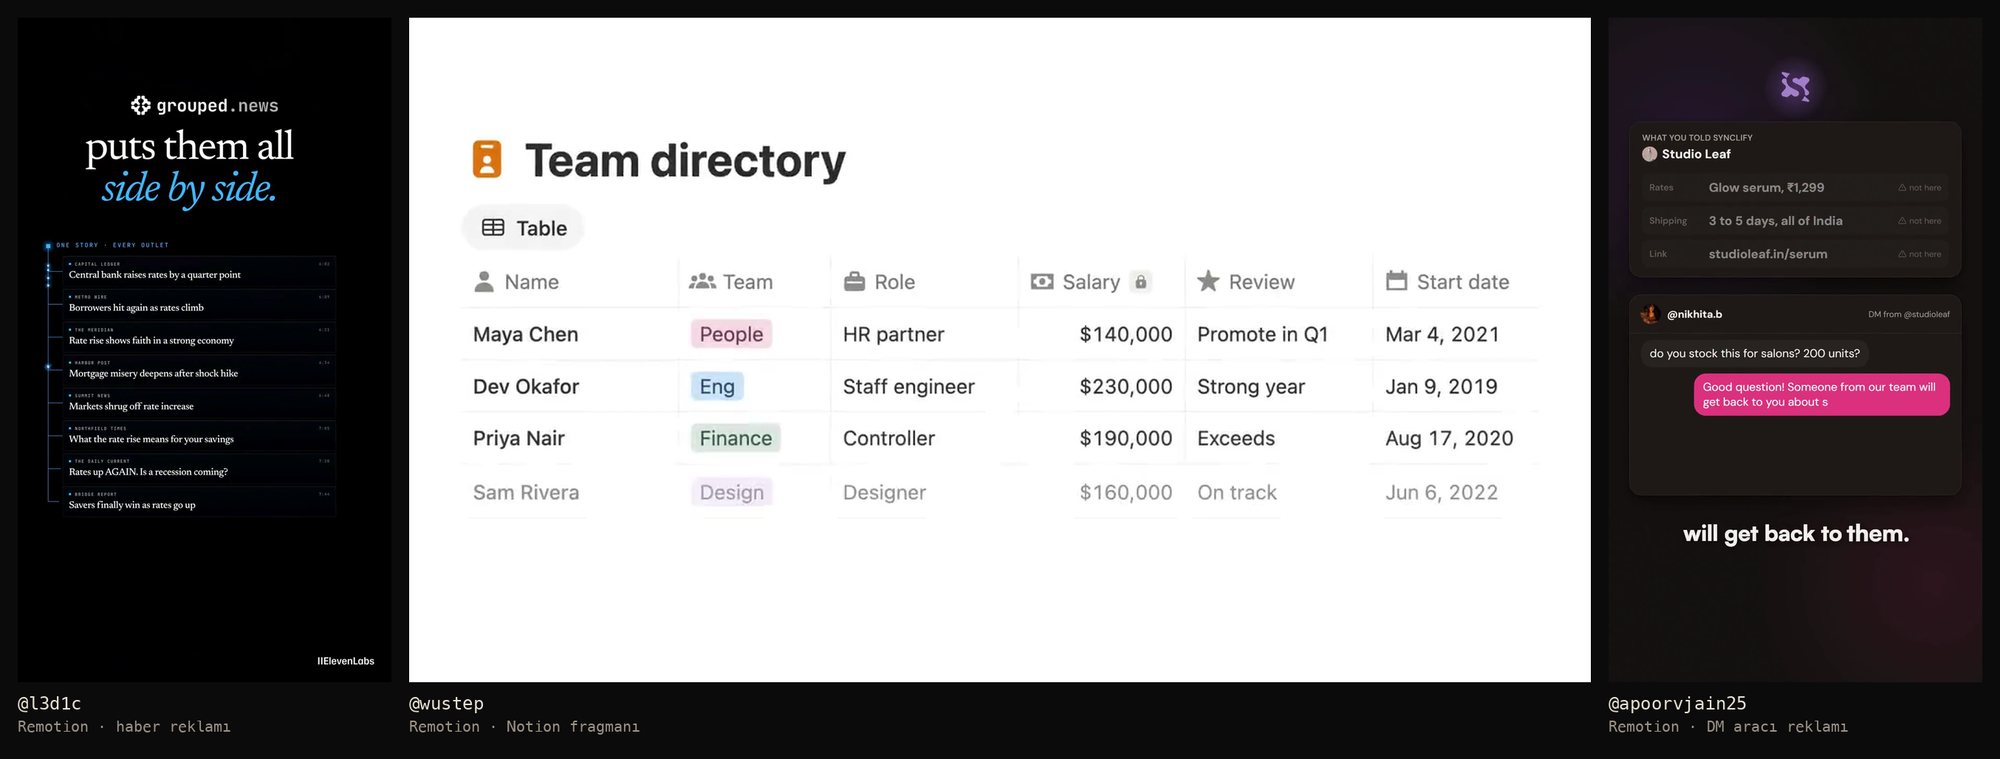
To see how big the trend has grown, look at skillry.dev: 475 videos made with Opus 5.5 are collected there with their original prompts, 288 of them motion graphics. Three felt especially close to me, and all three are Remotion:
@l3d1c made an ad for a news app in an hour and never opened a video editor. The ad uses the site’s own colours and fonts; the 30, 15 and 6-second cuts are different scene lists of the same code.
@wustep put out a trailer for Notion’s new feature over a weekend: two days, about 90 messages, 33 attempts and roughly 400 dollars of Claude usage.
In @apoorvjain25 ’s 51-second ad, Opus even wrote the music note by note in Python. Because the music and the picture read the same rhythm file, every message that lands on screen hits a beat in the music.
Some of the examples on the site were made with another skill called HyperFrames; it also draws video frame by frame with HTML and code. What they have in common: each one is a standalone ad or trailer. I use the same technique inside the talking reels I shoot every day.
So how do you start from scratch?
2. SETUP: FOUR STEPS
Copy Claude Code’s install command from claude.com. Open the terminal, paste the command, wait for the install to finish. Type claude. Ask for this: “Set up a Remotion project for me and add the Remotion skills.”
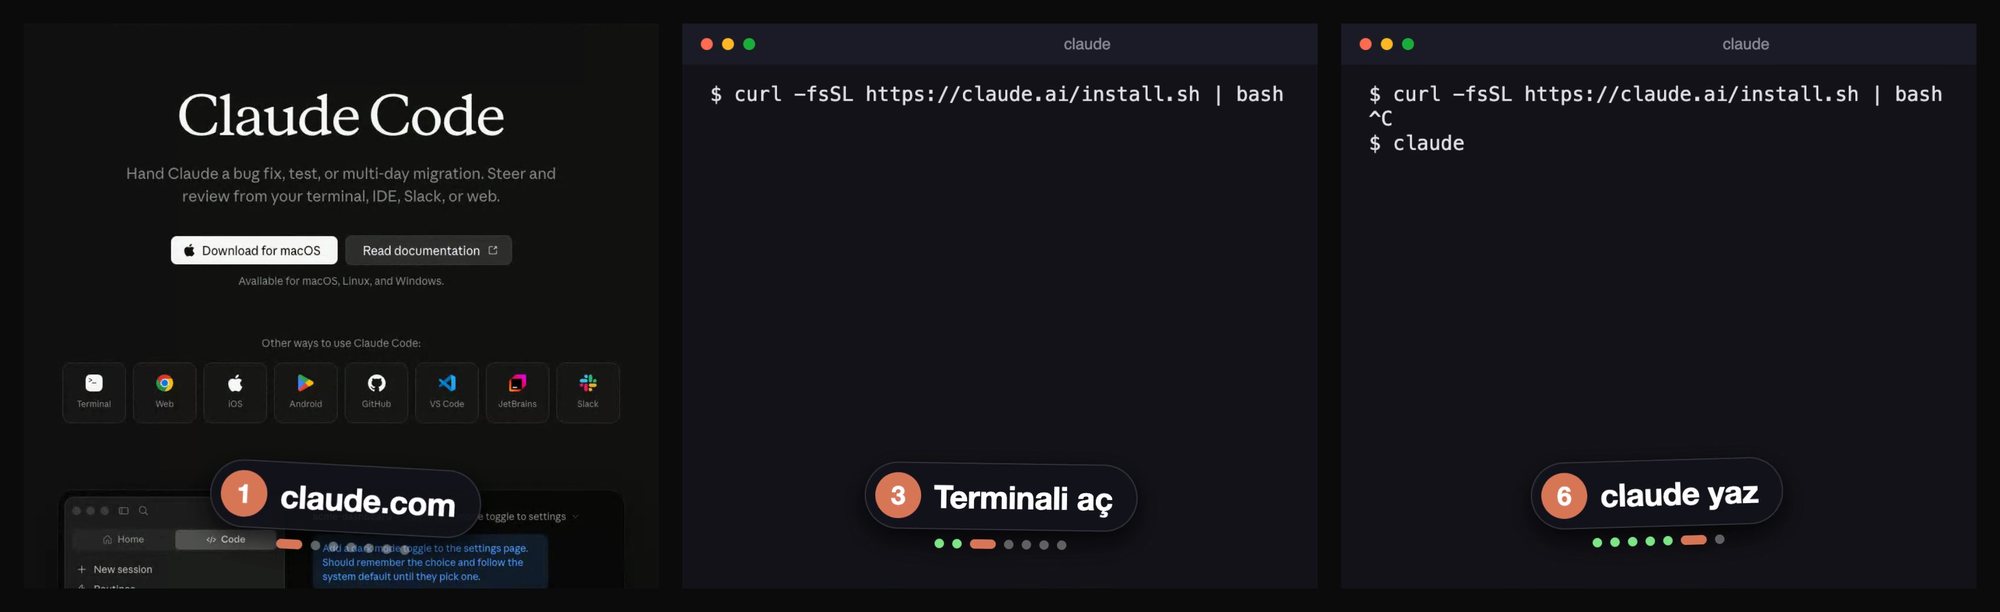
The “skills” in step four are the official skill package Remotion published for Claude Code. If you want to add it by hand, the command is: npx skills add remotion-dev/skills. This package teaches the agent how to write animation, typefaces, audio and timing in Remotion.
Tip: if the terminal scares you, Claude Code also has a desktop app and a VS Code extension, and you can have Remotion installed from there too. If you don’t know what to ask for, look at the remotion.dev/prompts gallery: what people made with which prompt sits there side by side.
3. GIVE THE AGENT A FOLDER, NOT A VIDEO
I don’t drag the raw video into the chat and say “make this a reel”. Every reel has a project folder: the raw footage, reference reels I like, music, sound effects and, most importantly, the rules file.
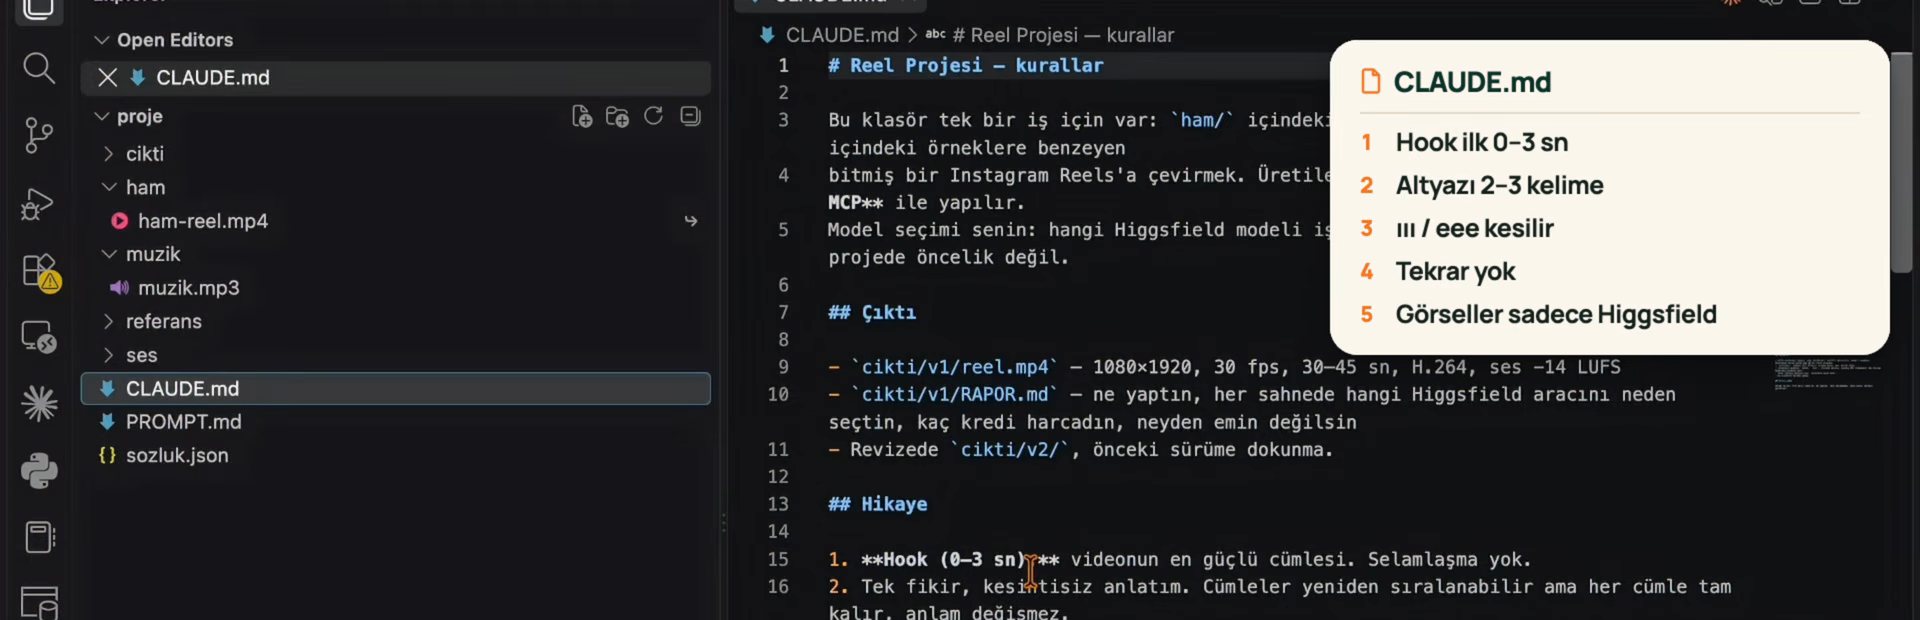
CLAUDE.md holds the rules for the reel: hook in the first 3 seconds, subtitles of 2-3 words, “ums” and repetitions get cut, every revision is written to a new folder. Every one of these rules came from a revision round. Because the agent reads this file in every session, I never give the same note twice.
Tip: put a sozluk.json in the folder. Whisper mishears my pronunciation of some words, and “Higgsfield” tops the list. Without the dictionary the wrong word goes straight into the subtitles.
4. WHAT HAPPENS BEHIND THE SCENES? EIGHT STEPS
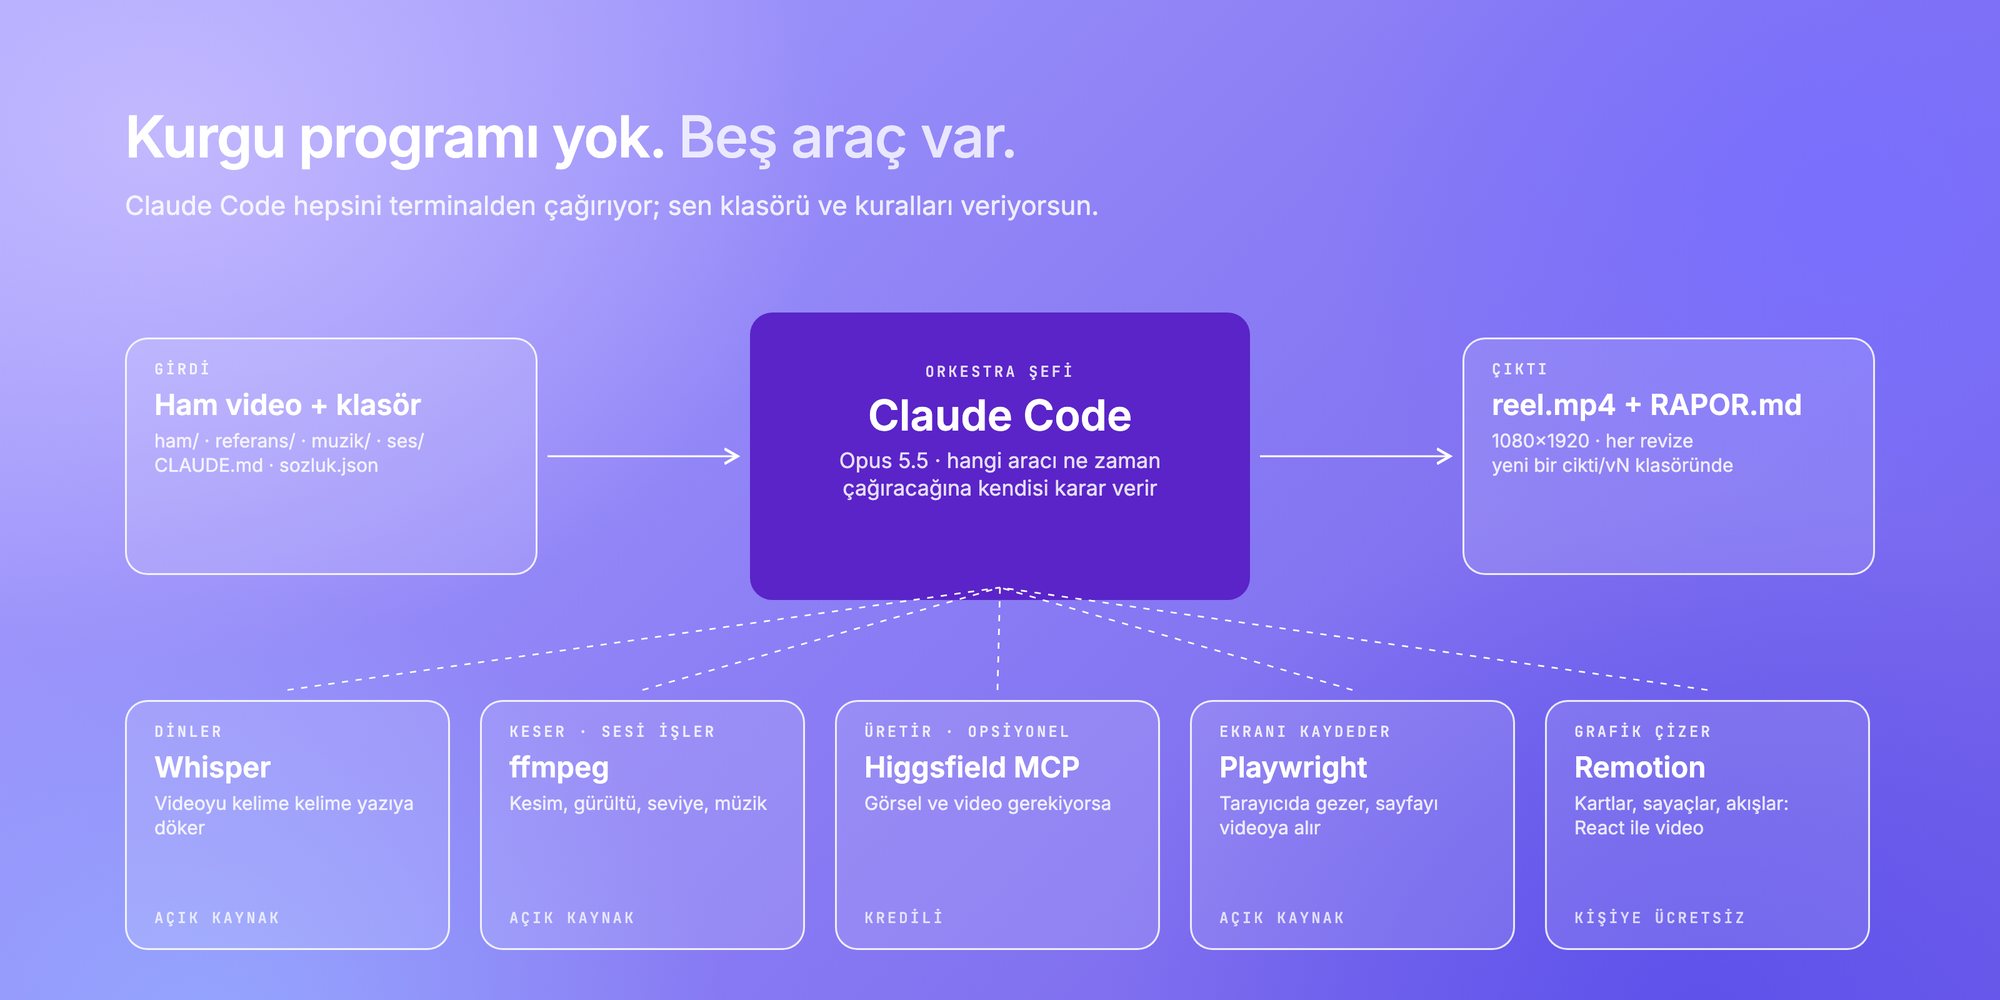
I give the prompt and walk away. In that time the agent does eight jobs in order. Claude Code drew the cards below with Remotion too; I used them while explaining this process in my latest YouTube video.
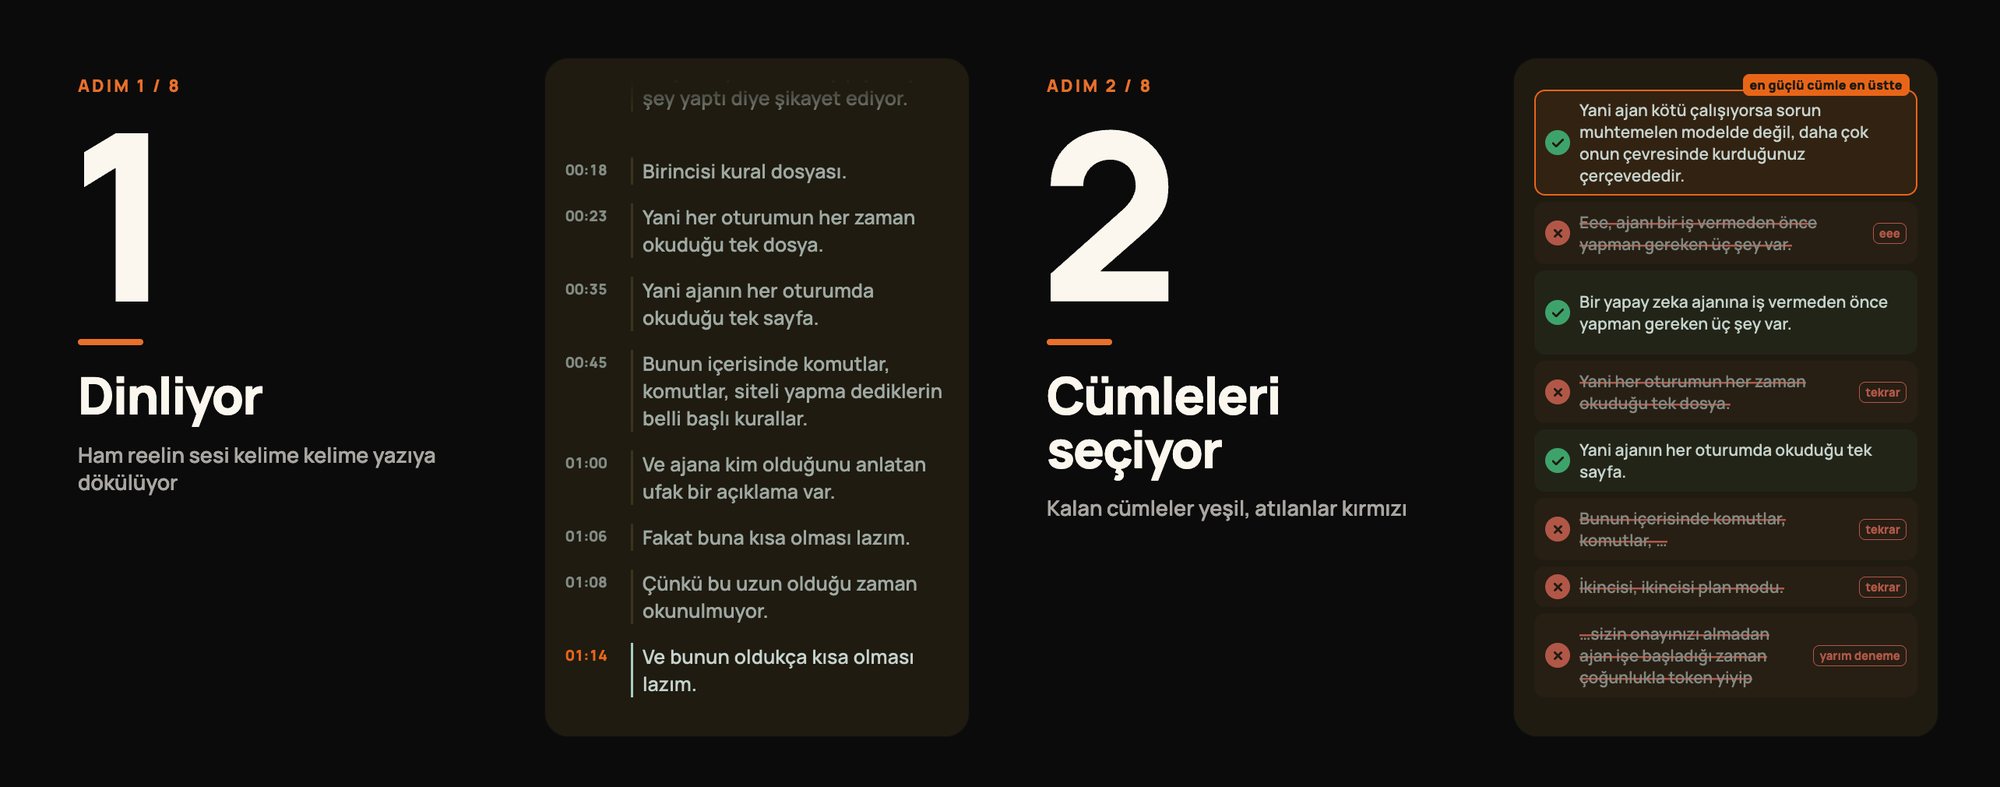
1. It listens. It transcribes the entire raw footage. 2. It picks the sentences. If I tried the same sentence three times, it takes the cleanest one, drops the stumbles and puts the strongest sentence first.
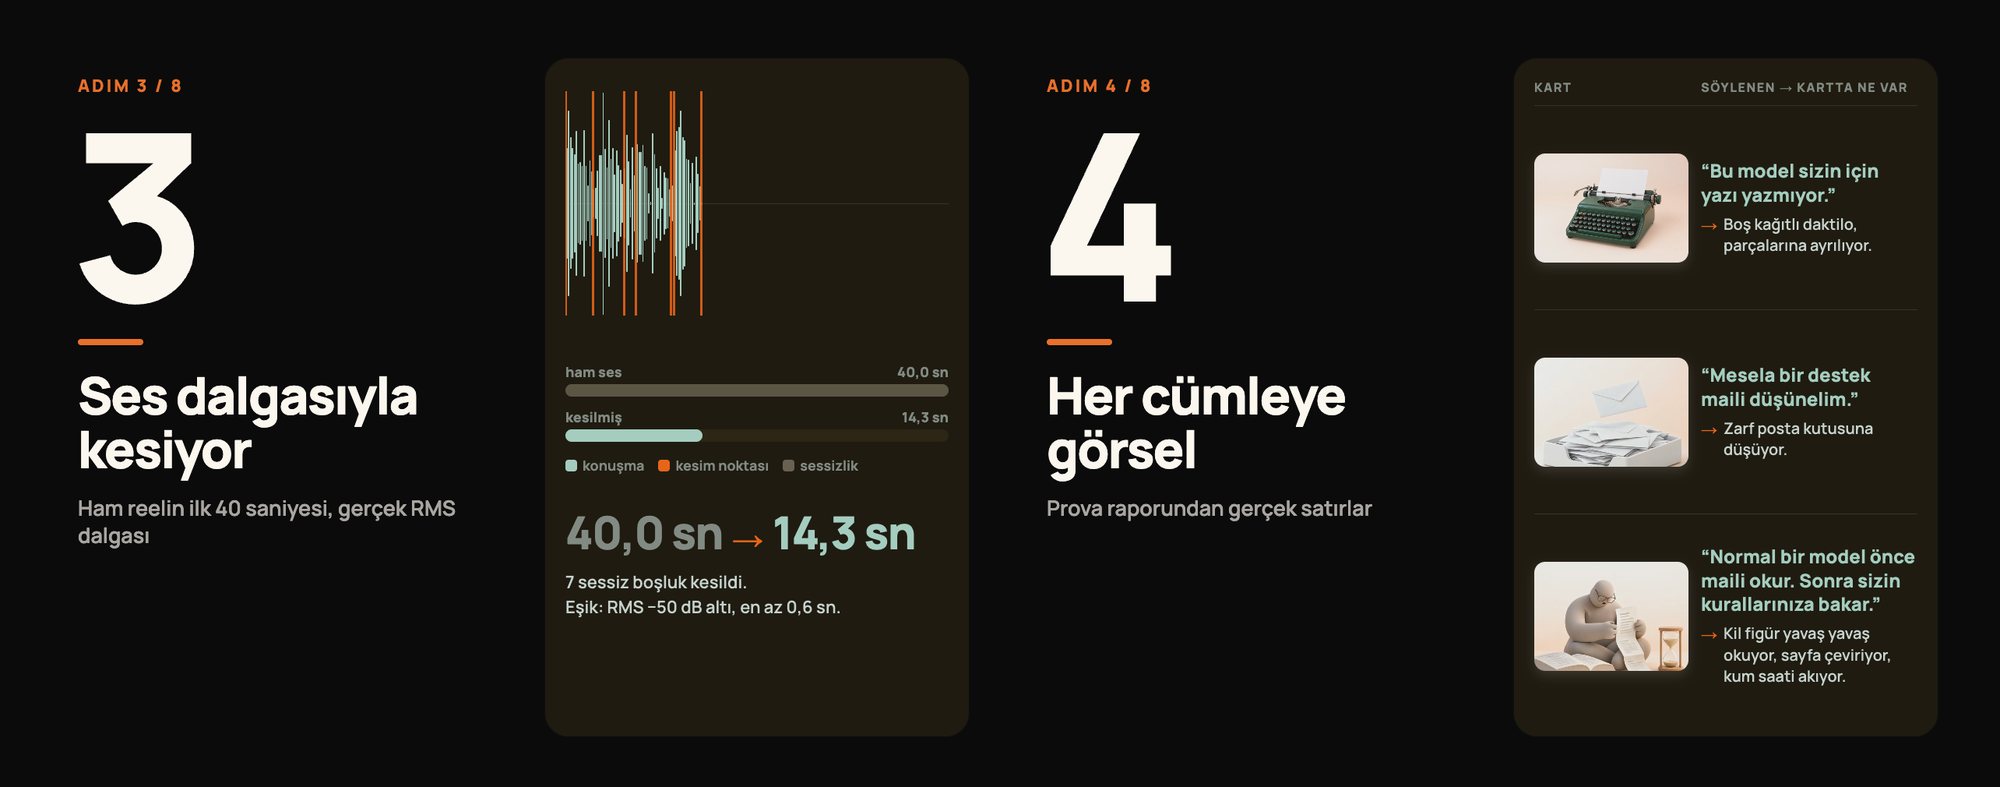
3. It cuts by the waveform. It finds the cut point from the waveform without trusting the transcript; in the example, 7 silent gaps came out of the first 40 seconds and 14.3 seconds were left. 4. It plans a visual for every sentence. Whatever I’m talking about should be what’s on screen.
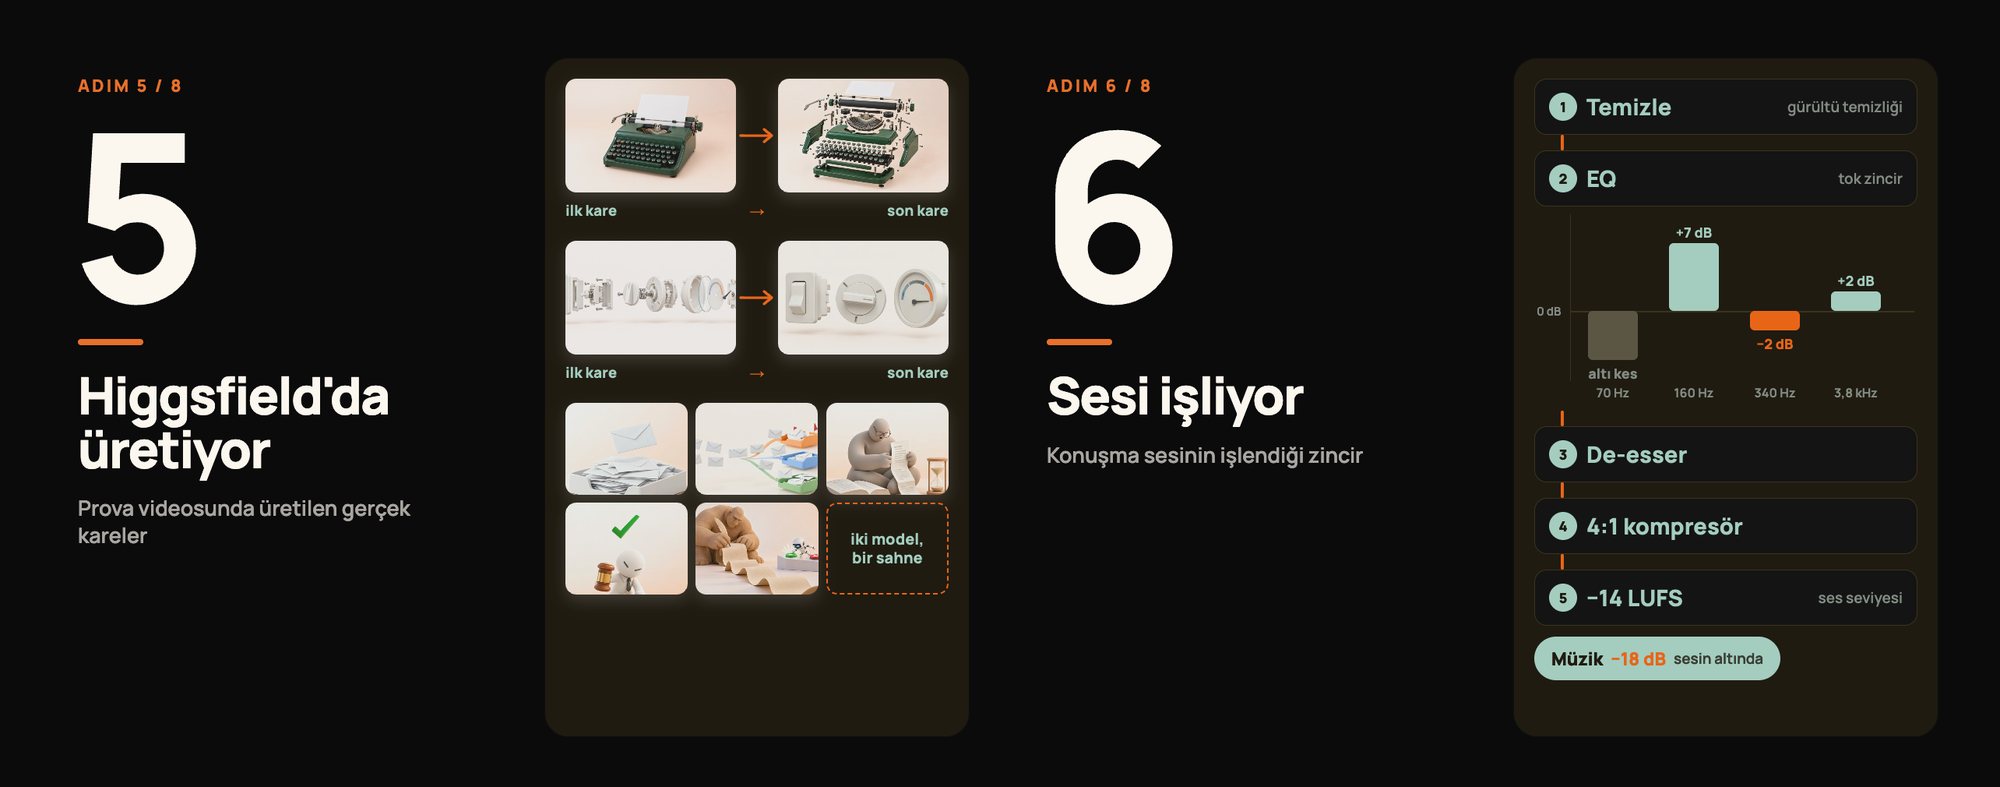
5. It prepares the visual. In that video Higgsfield did this step. In today’s reels two things took its place: real screen recordings captured with Playwright and graphics drawn with Remotion. 6. It processes the audio. It removes noise, brings the speech to -14 LUFS and sets the music under the speech.
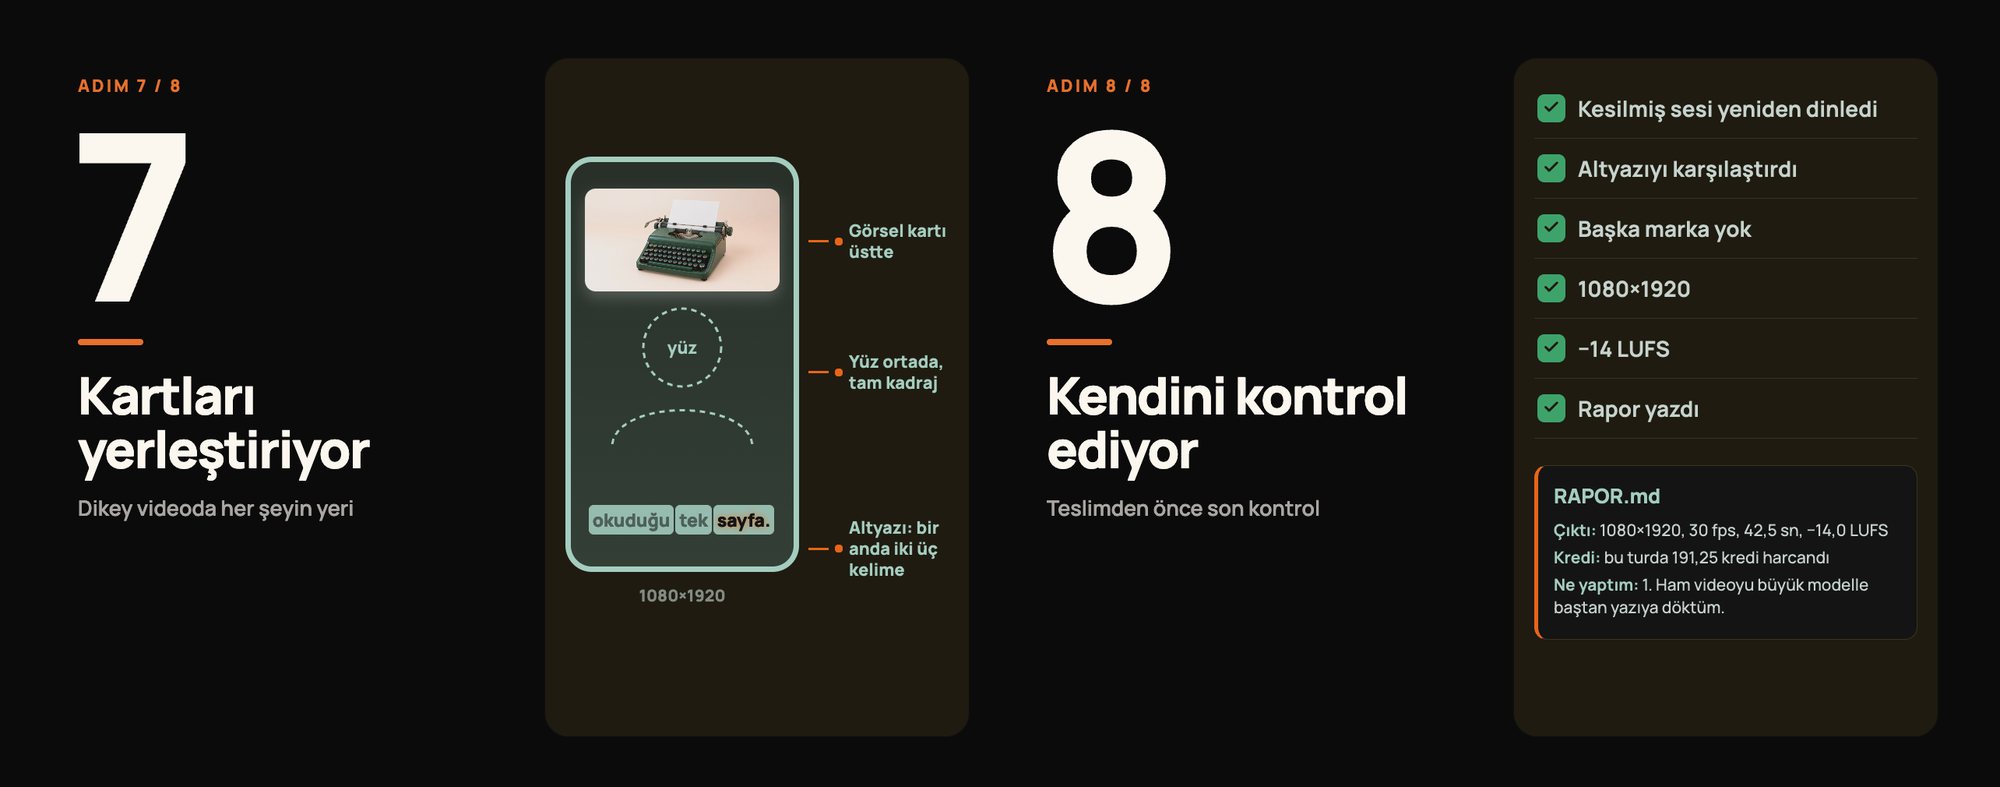
7. It lays things out. My face at the bottom, the visual on top, subtitles in between. 8. It checks itself. It listens to the cut audio again, compares the subtitles, then writes a report.
The two parts of step five are what the motion graphics trend doesn’t talk about.
5. PLAYWRIGHT RECORDS THE SCREEN
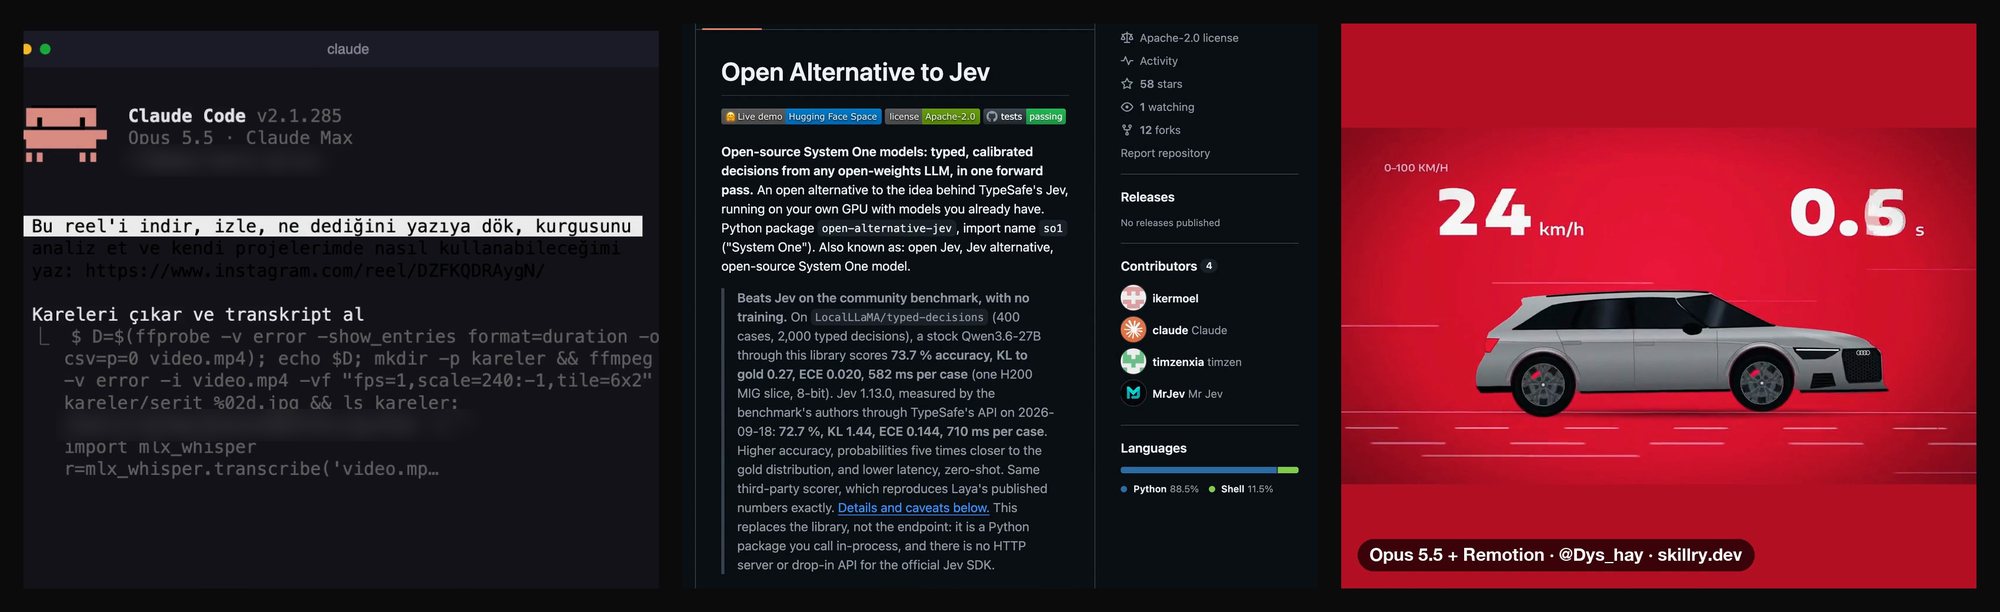
Playwright is an open-source browser automation tool. Claude Code writes a script, the browser opens, goes to the page and records the screen. In the Jev reel, every project I talk about appears on screen with its own GitHub page. The agent captured the whole page in dark mode at double resolution, then turned it into a slowly scrolling video.
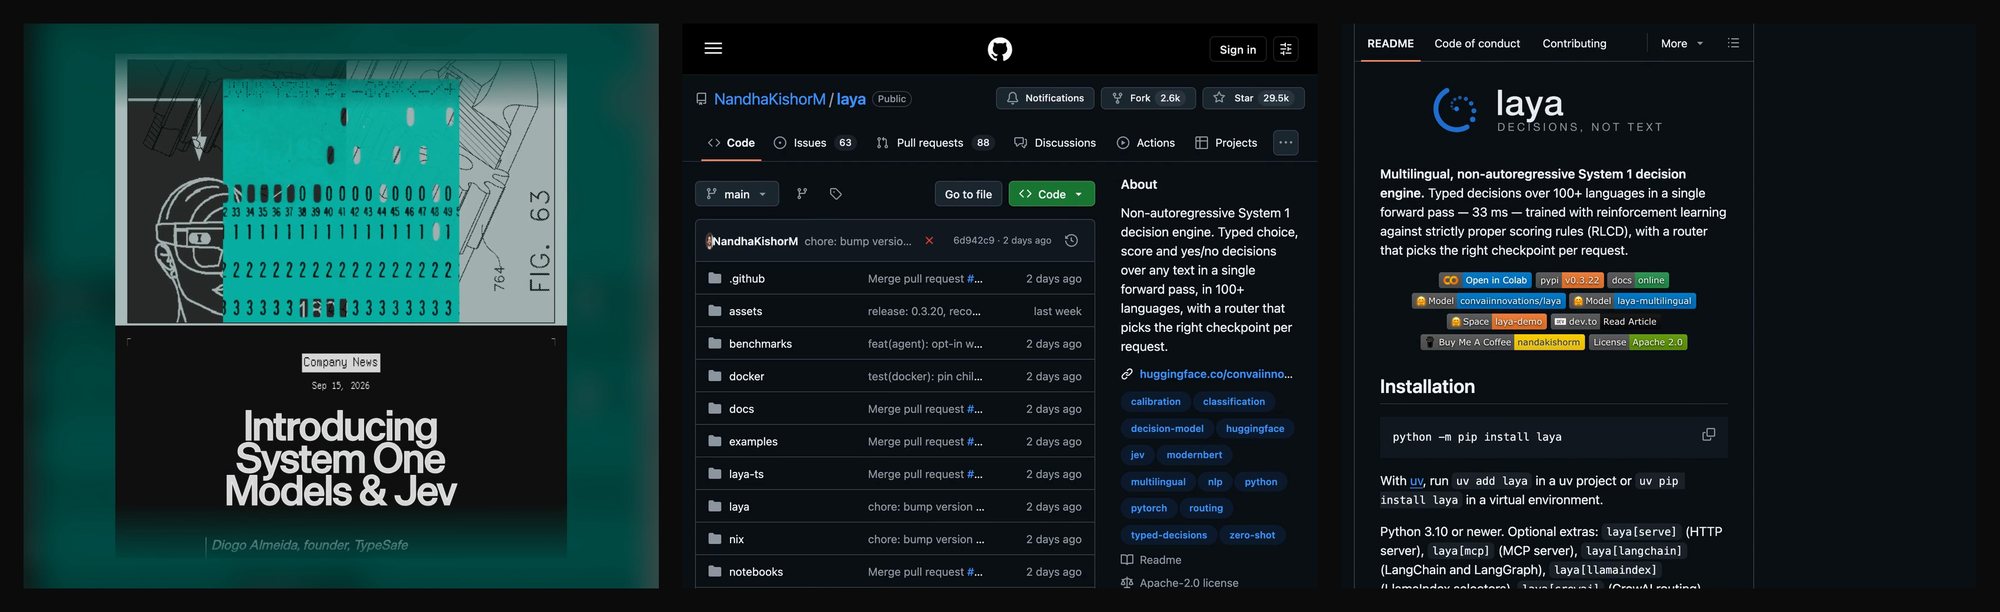
Terminal recordings come the same way. The Claude Code session in the archive reel really ran; the agent collected snapshots of the terminal and turned them into video frame by frame with Playwright. The same tool is also used to collect data from a page; that’s called scraping (pulling data from a page). If you do it, follow the site’s rules.
Tip: never have a video model animate text-heavy screens. In an earlier reel I gave terminal recordings to a video model and the text broke. A real recording stays sharp and you pay nothing.
6. REMOTION DRAWS THE GRAPHICS
Everything that isn’t a recording is drawn in code in Remotion. In the Jev reel the answer to “Is Jev open source?” comes as a highlighted card, the comparison of two models as a bar chart, the cost difference as a table. The numbers aren’t made up; they were taken from the relevant GitHub pages.
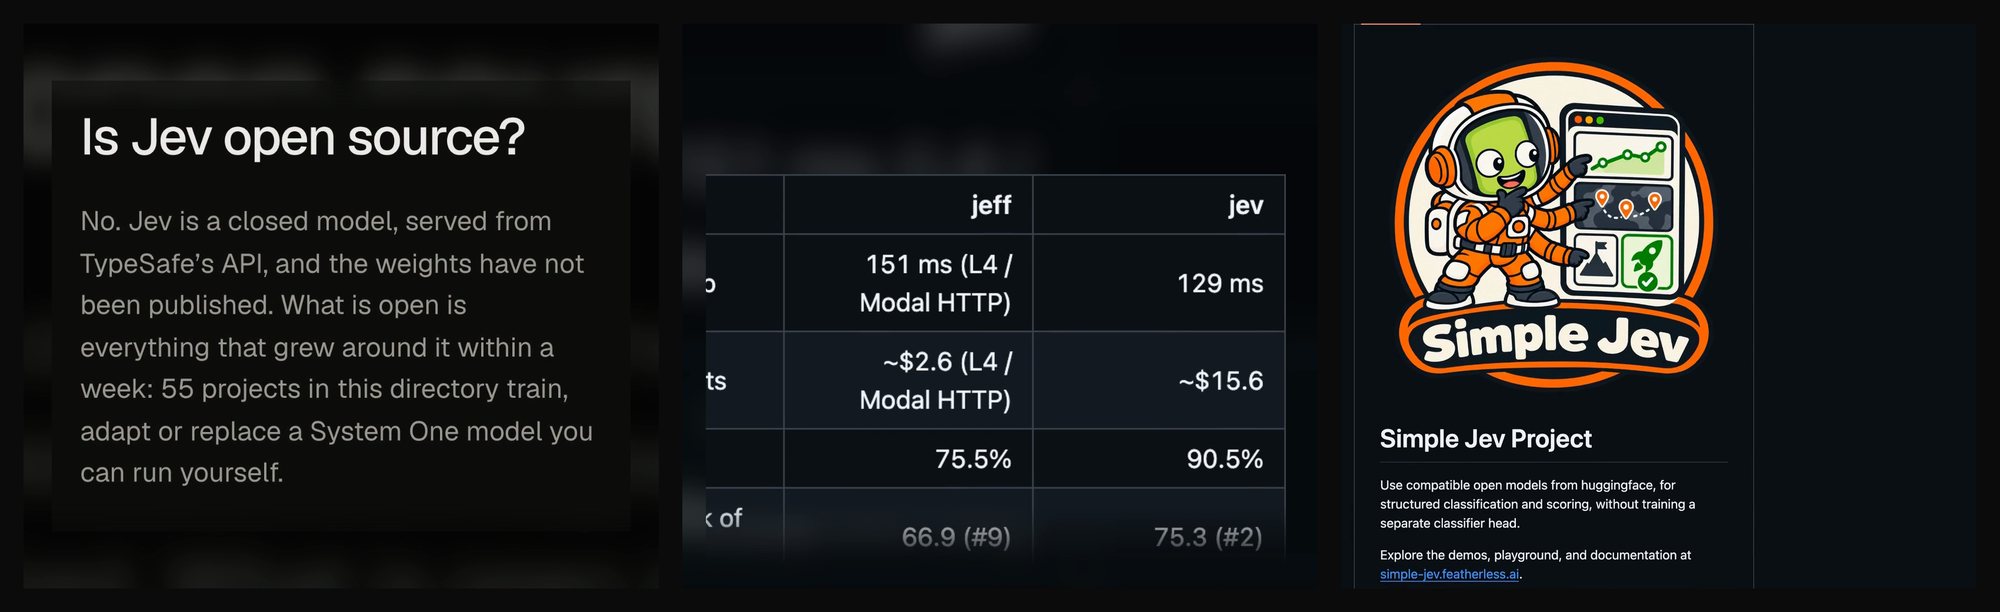
My favourite part is the hand gestures. When I shoot, I show a lot with my hands. The agent finds where my hand is in the video, and the moment I count on my fingers it places the number from 1 to 5 above my finger. When I say “55 open projects”, the number 55 appears above my palm.
Tip: rendering is free, but one reel takes 6-10 minutes. First ask the agent to grab 3-5 frames with npx remotion still, look at them, then move on to the full render. Spotting a wrong card takes seconds before the render and minutes after it. @l3d1c took this a step further: instead of watching a render, they have about 20 frames laid out on a single contact sheet and look at the whole edit at a glance.
7. THE FIRST VERSION WASN’T GOOD: GIVE YOUR NOTE IN PLAIN WORDS
None of today’s three reels was done in the first version. The Jev reel took six versions, the archive reel two. I called the third version of the setup reel “disgusting”, and I didn’t like the examples either. In the fourth version the agent took the examples from Remotion’s official prompt gallery, and in the fifth it replaced the opening with the “Opus 5.5 + Remotion” work on Skillry.
The top half of the archive reel is a real Claude Code session. I gave the agent the link to a reel I liked. It downloaded the video, extracted its frames, transcribed what it said, analysed its edit and wrote into a file how I could use it in my own projects.
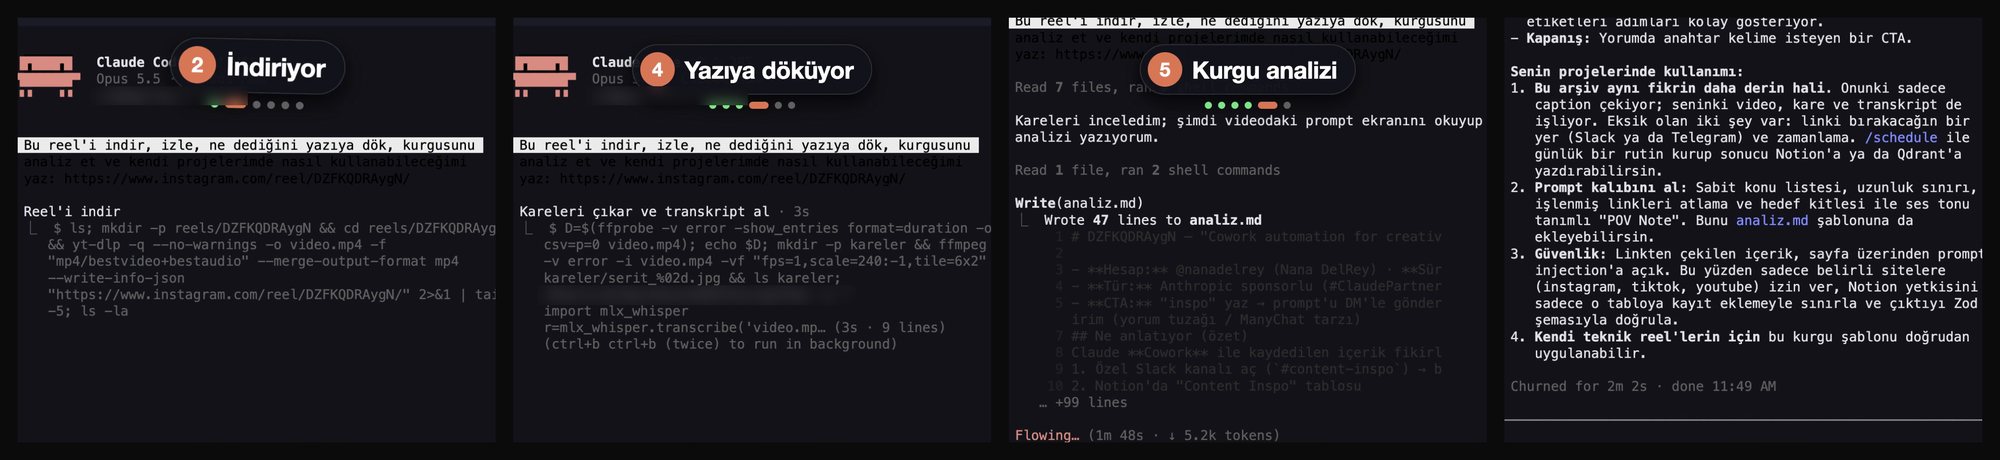
Tip: have every revision written to a new file, and don’t delete the old one. All versions of the setup reel, from v1 to v4, are still in the folder. Watching them side by side shows you what improved, and if something breaks you have somewhere to go back to.
8. COST: IMAGE GENERATION IS OPTIONAL
In my latest YouTube video I ran the same process with Higgsfield. There, generation models made the images and videos, and a single round with one prompt cost about 250 credits. No image or video model was used in today’s three reels: the screens came from Playwright, the graphics from Remotion.
The two aren’t rivals. If you need a robot character, a cinematic scene or a product shot, you need a generation model. If what I’m talking about is a page, a terminal or a number, a real recording and a graphic drawn in code are both sharper and free.
So: Opus 5.5 being good at motion graphics pays off more inside an edit than as a standalone animation.
Most people see this trend as logo animation. I hand it the edit of the reels I shoot every day; my job is to shoot, watch and give notes.
The video where I walk through the same process with Higgsfield from start to finish: https://youtu.be/FIiV06klo4E
 Jev Doesn’t Write, It Decides: I Opened It Up, Built a Product, and Measured How Honest It Is