 article · interactive 3D
I built my agents an office in 3D: Claude Code + the Higgsfield API
22 September 2026 · selma kocabıyık
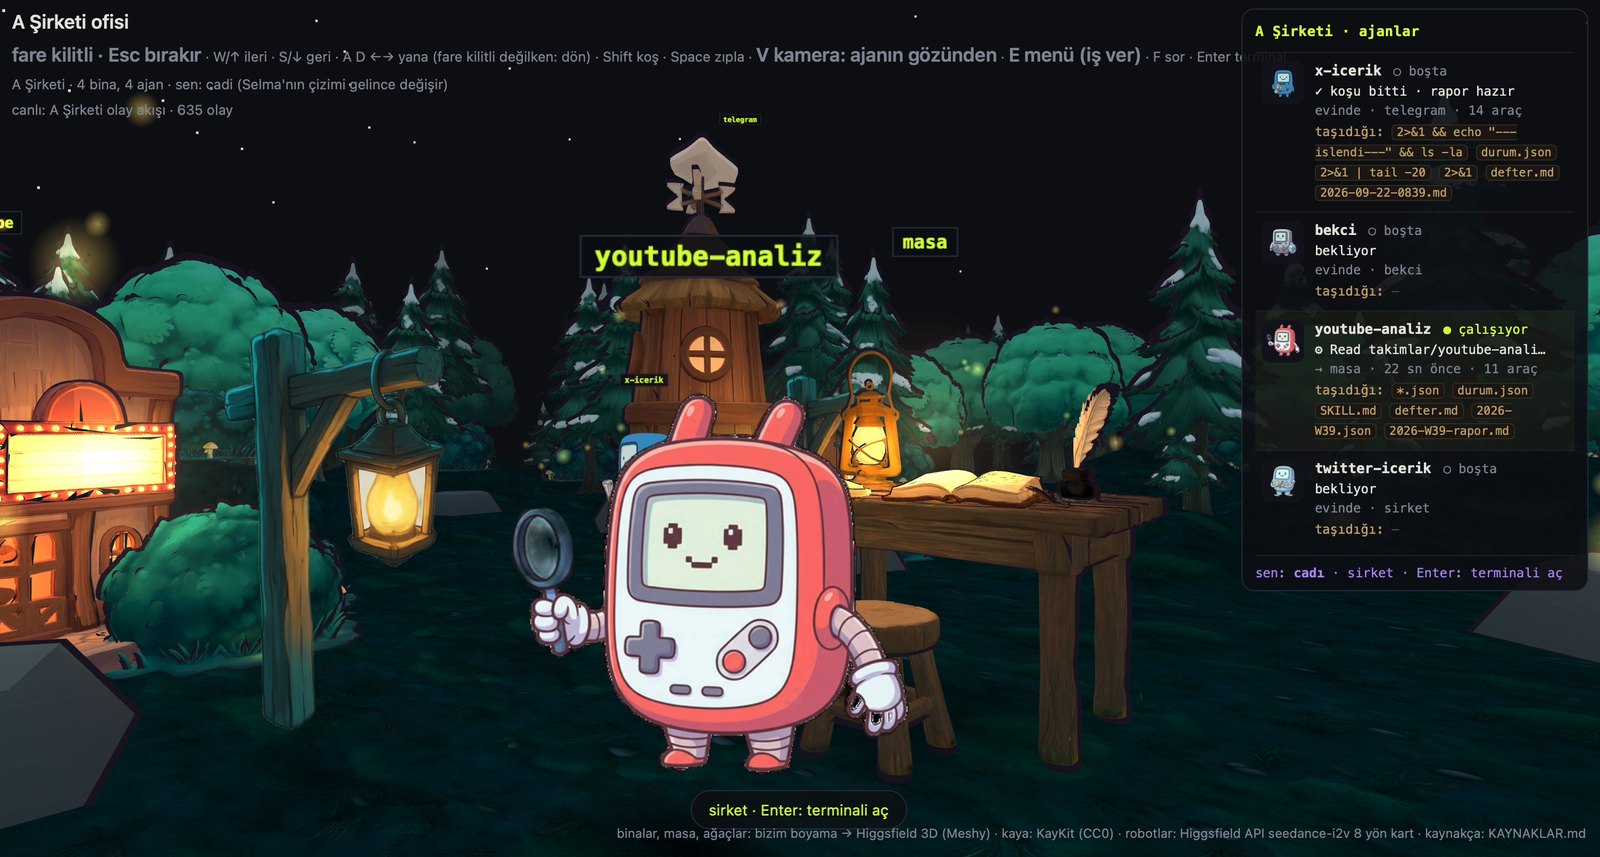
My agent company had a two-dimensional map: a canvas, one front-facing PNG per agent. In a single day I turned it into a 3D office I can walk around with the mouse. The buildings, the trees and the desk were modelled from my own paintings; the robots turned in eight directions; the agents walked on screen while they were actually working. All of the visual production was done with one Higgsfield API key — no subscription, you pay for what you generate.
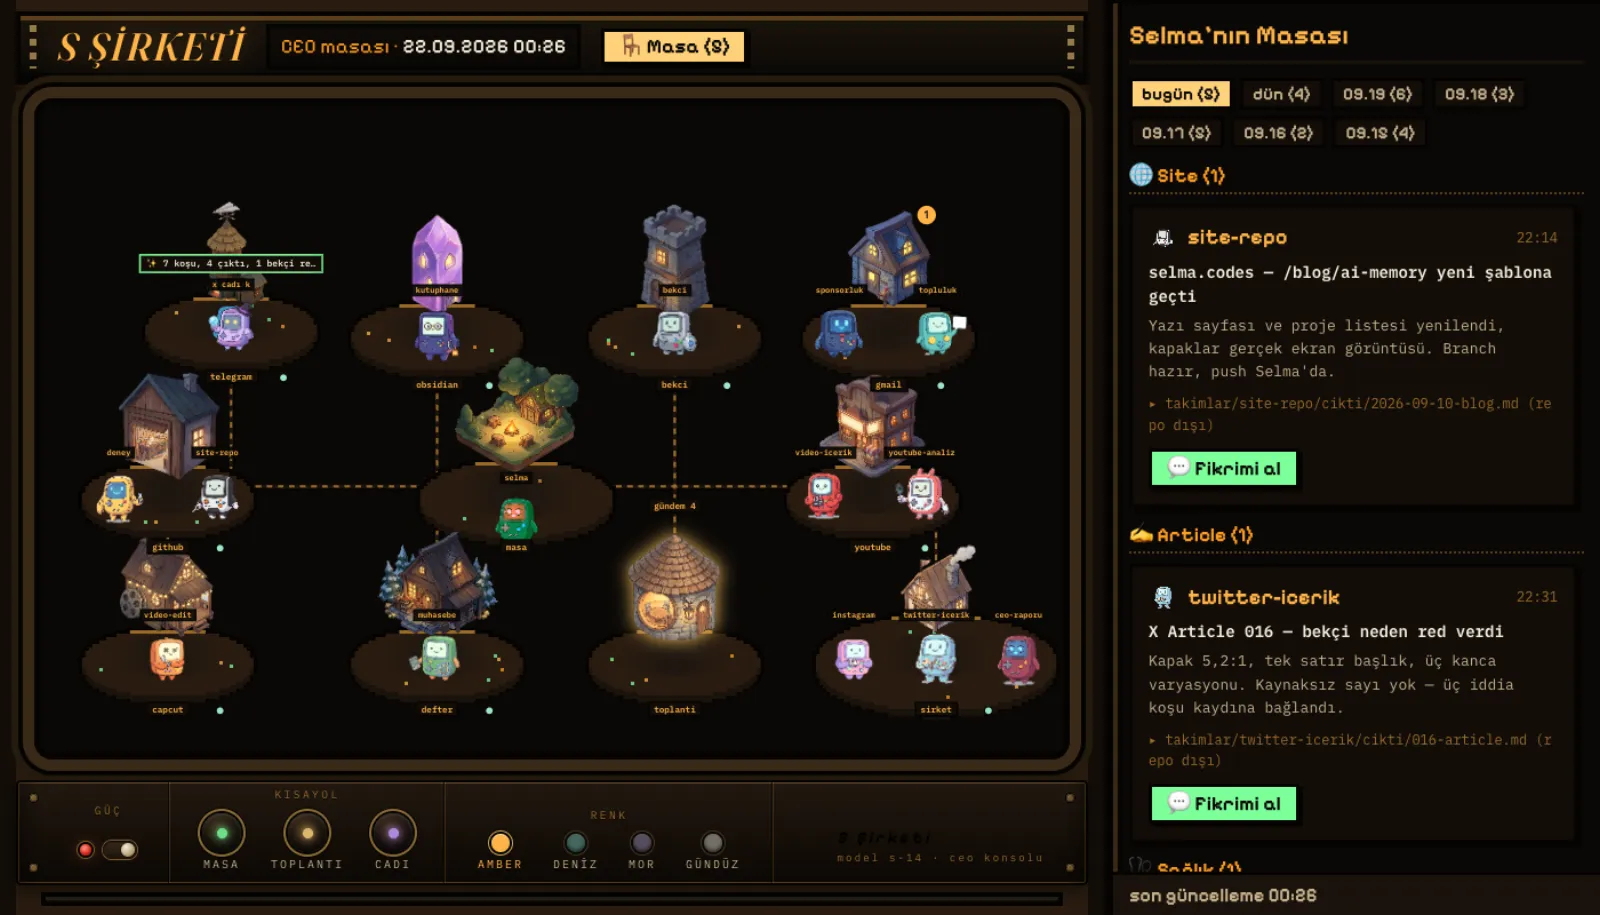
1. The product first: the game while it runs
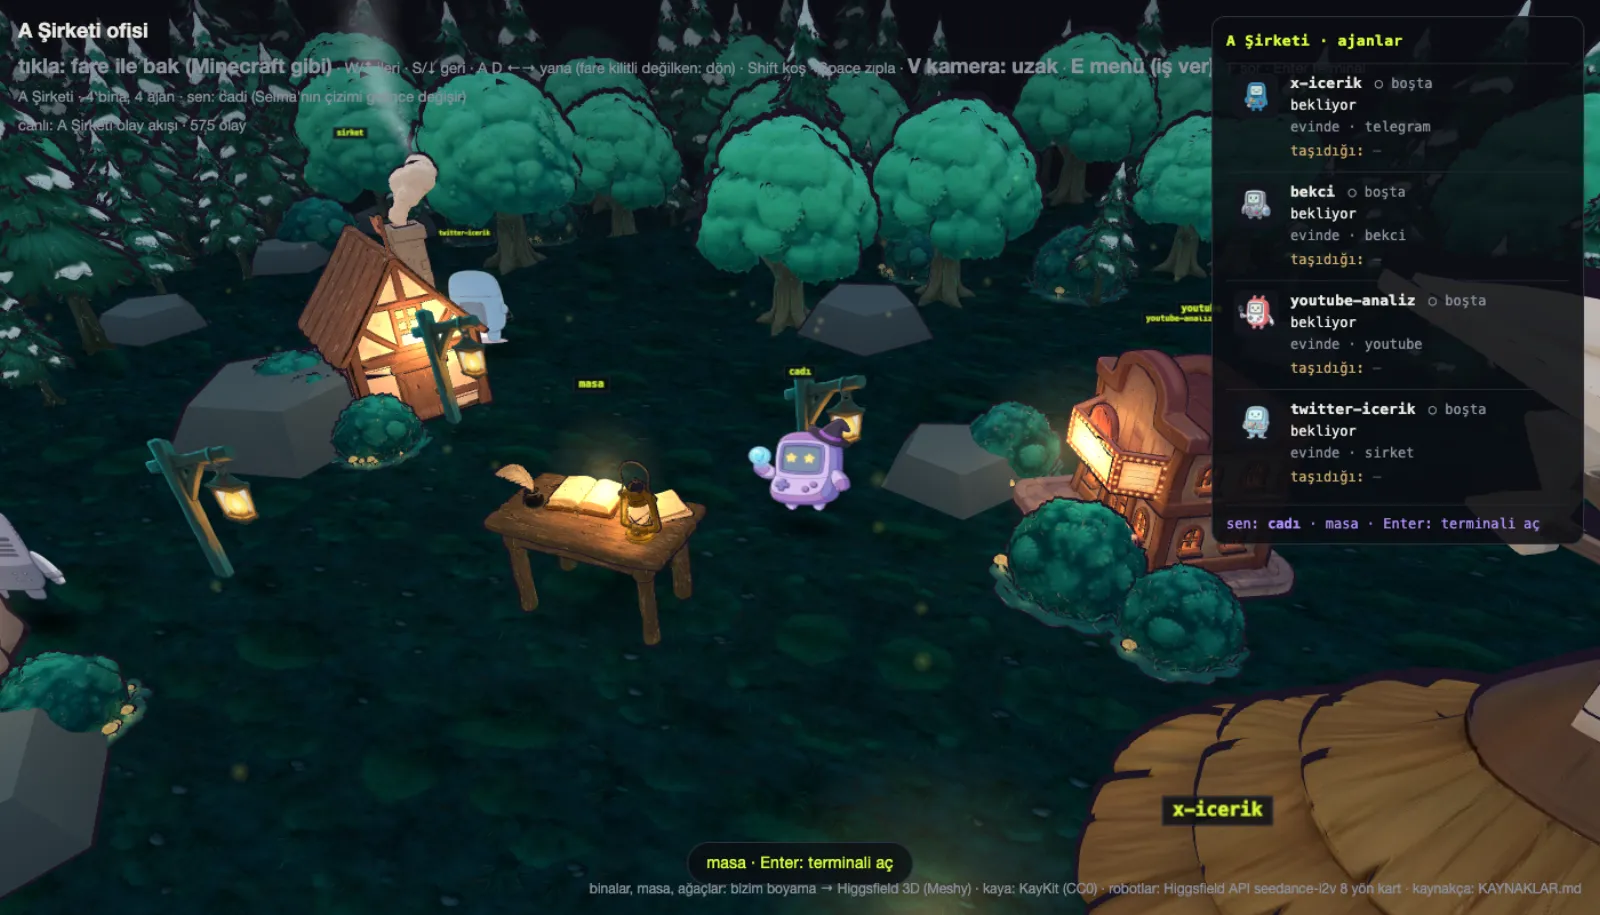
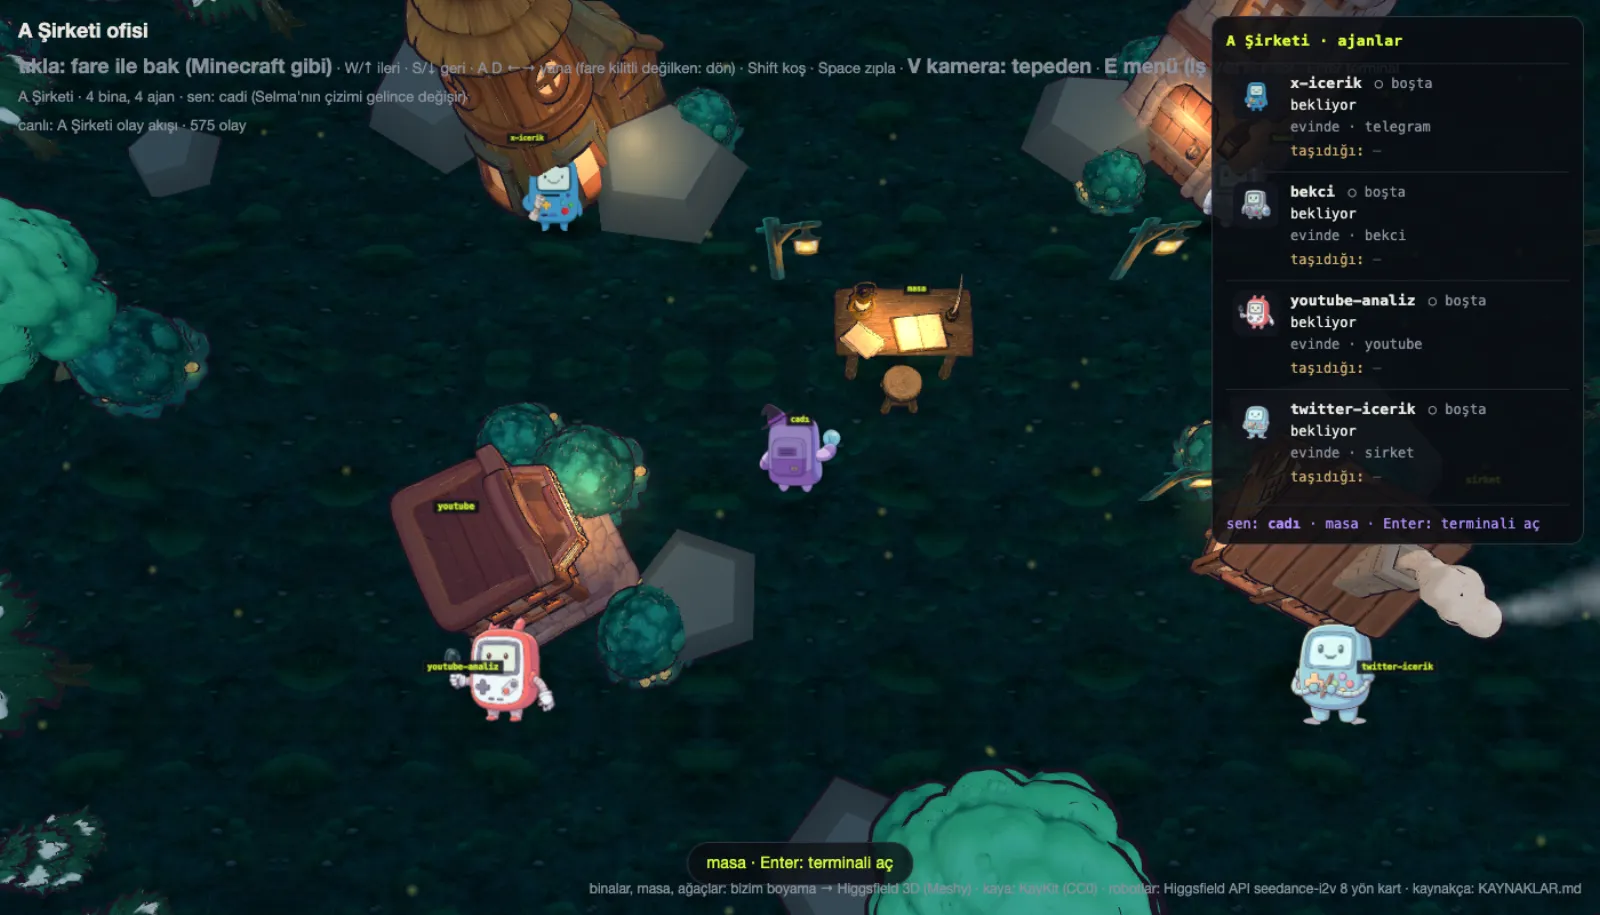
The panel on the right is not decoration. Every line standing there is read from the agents’ real run logs: who is idle, who is working, which tool it called, which file it touched. When an agent takes a job it walks out of its house to the desk in the middle, with a bubble above it showing the tool it is using right then; when the run finishes, “report ready” drops in.
The camera is third person. V switches between over-the-shoulder / top-down / the agent’s own eyes, Space jumps, E opens the company menu, and Enter at a building’s door opens that team’s terminal.
2. Step by step: from a 2D scene to a game
This did not happen in one move. There are eleven separate stops and I kept each one as its own file — because “from where to where” can only be shown if the intermediate versions survive. The screens below are from those stops.
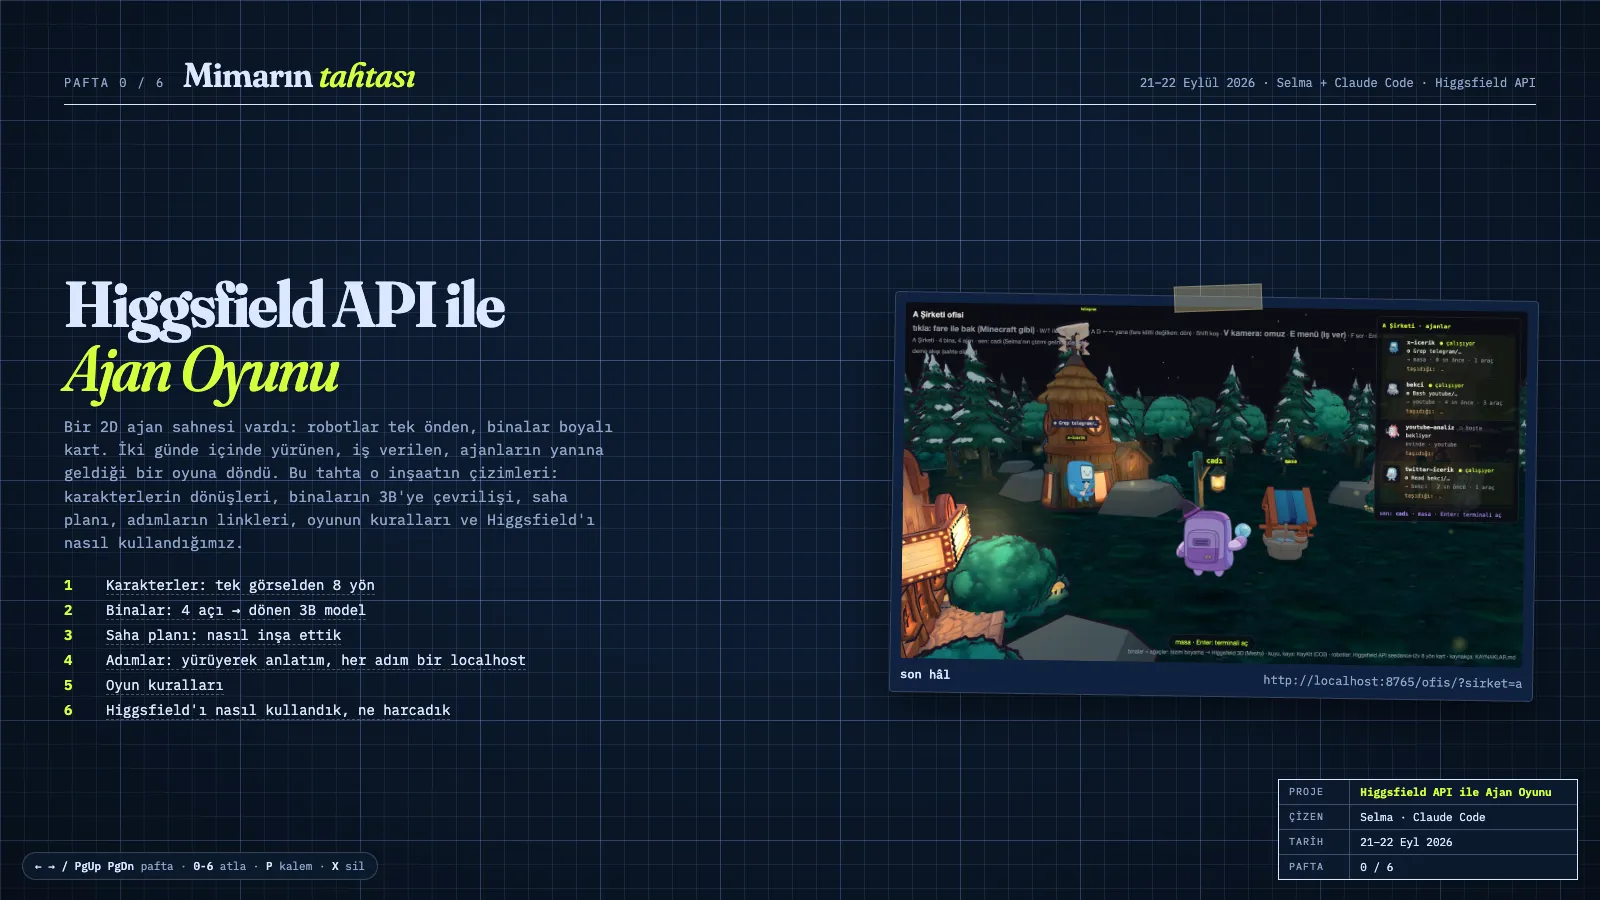
Step 0 — the start: a two-dimensional scene
A canvas, one front-facing PNG per agent, pixel-agents sprites as backup. Ugly, but it worked, and it showed exactly what was missing: depth, direction, the ability to step inside.
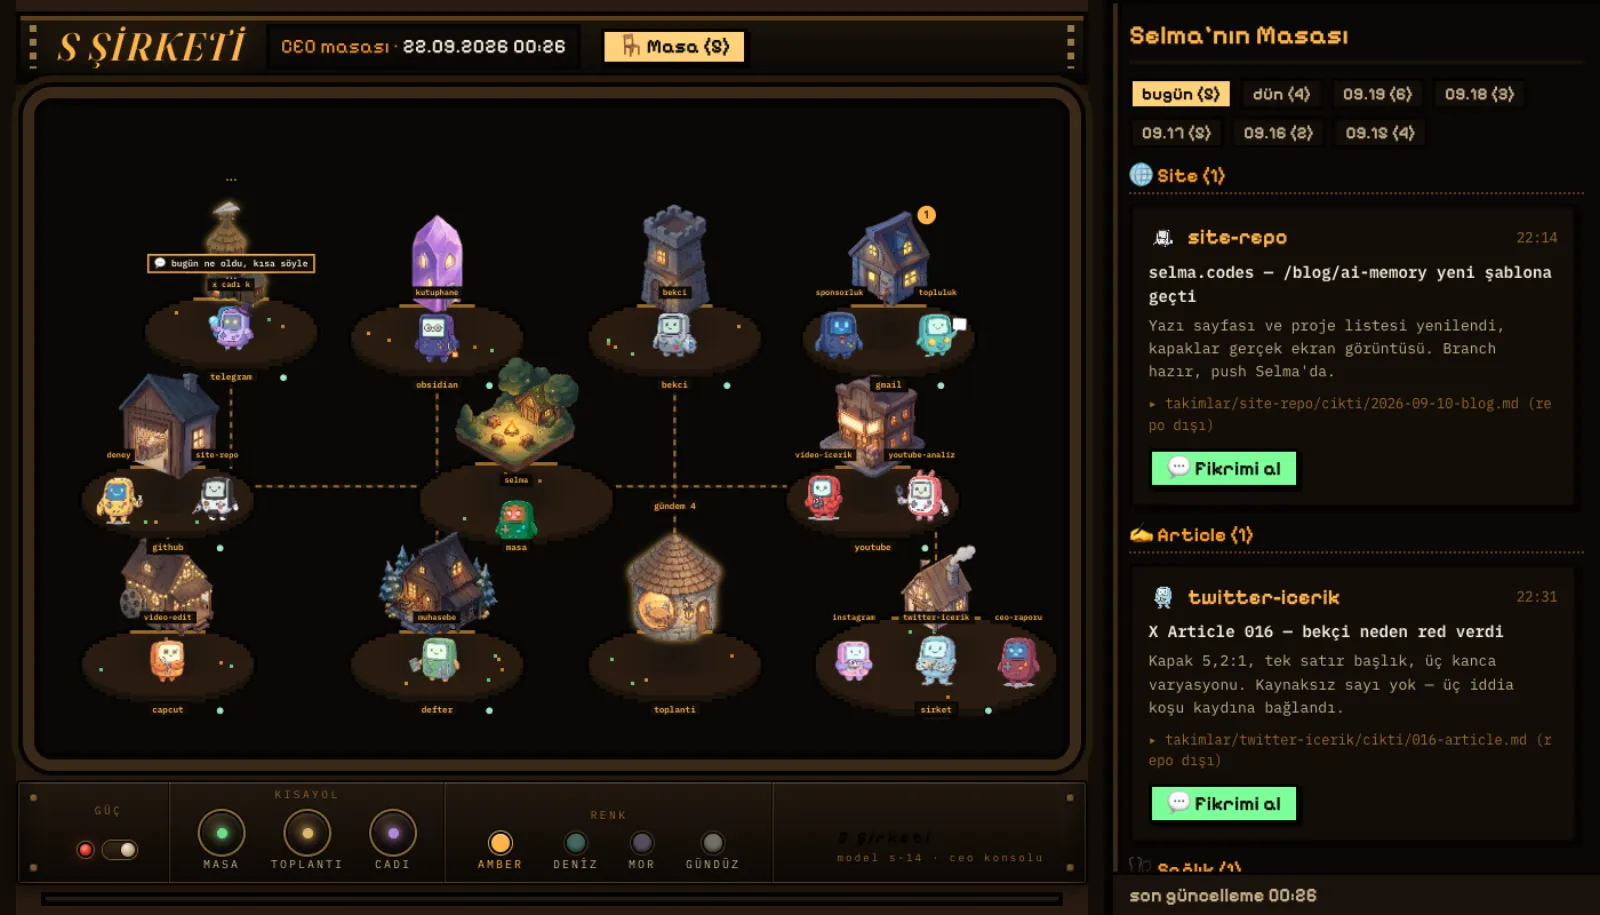
Step 1 — let the characters face eight directions
First four angles of the character were generated (qwen-image-3/edit, 2k, 0.075 USD per image), then a five-second rotation video from that image (seedance-2.5/image-to-video). Eight frames were cut from the video with FFmpeg, and rembg cleaned the background. While a robot walks, one of those eight frames is picked according to its movement angle.
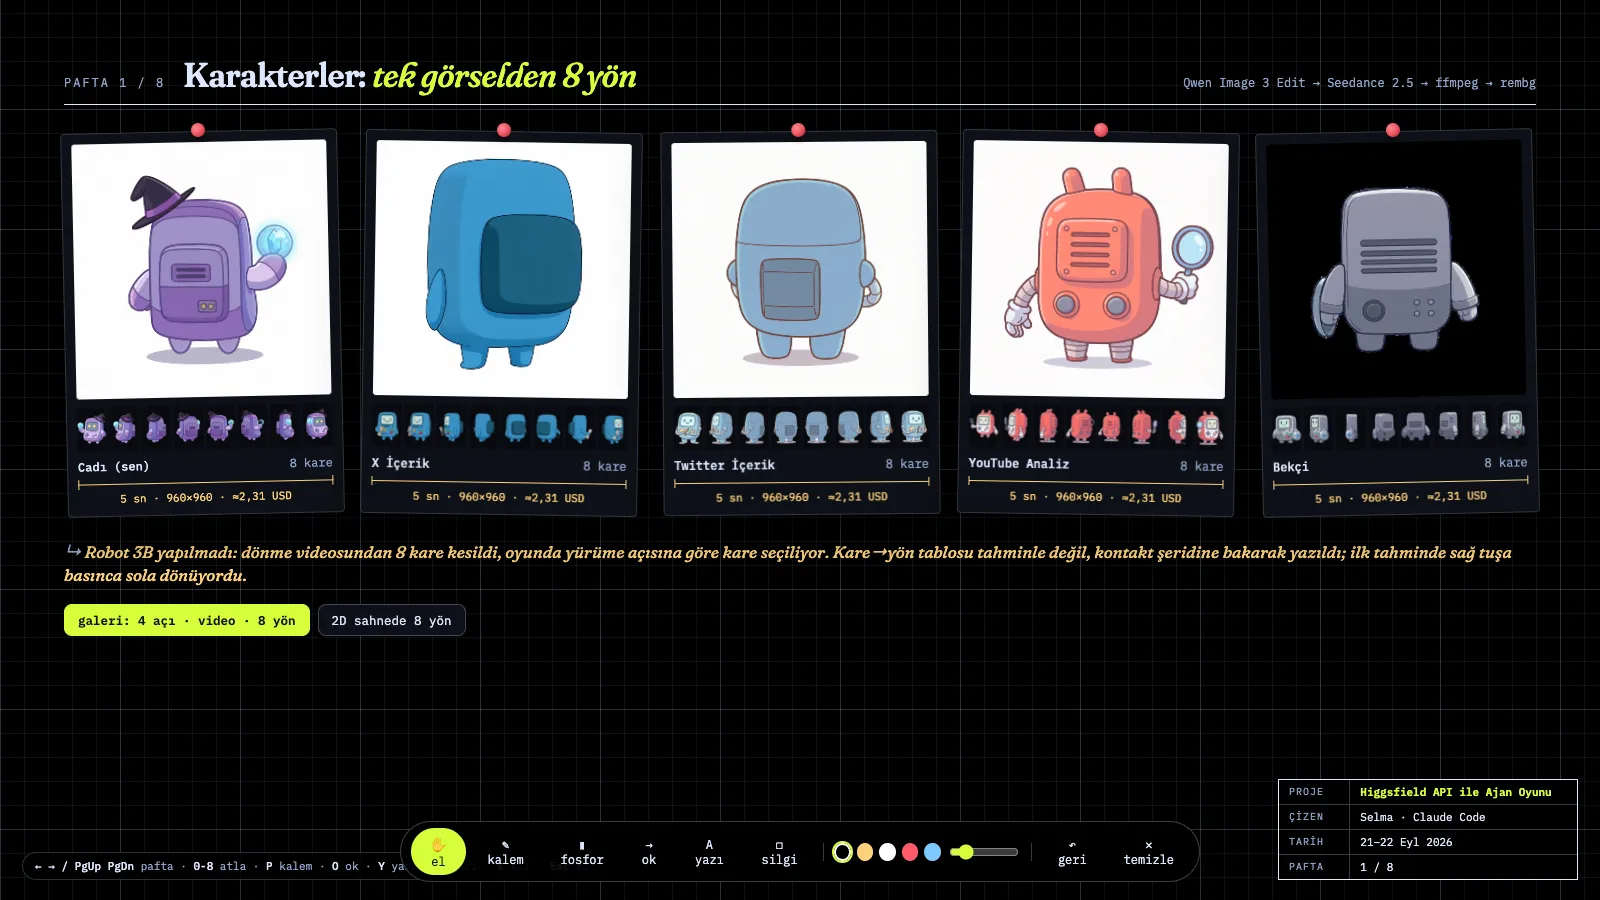
Step 2 — eight-directional robots in the scene
The same 2D scene, with one difference: the robot now faces the direction it is going. This is where I made my first mistake — I wrote the frame→direction table from assumption, and pressing right turned the character left. Looking at the contact sheet showed that frame number two was facing left.
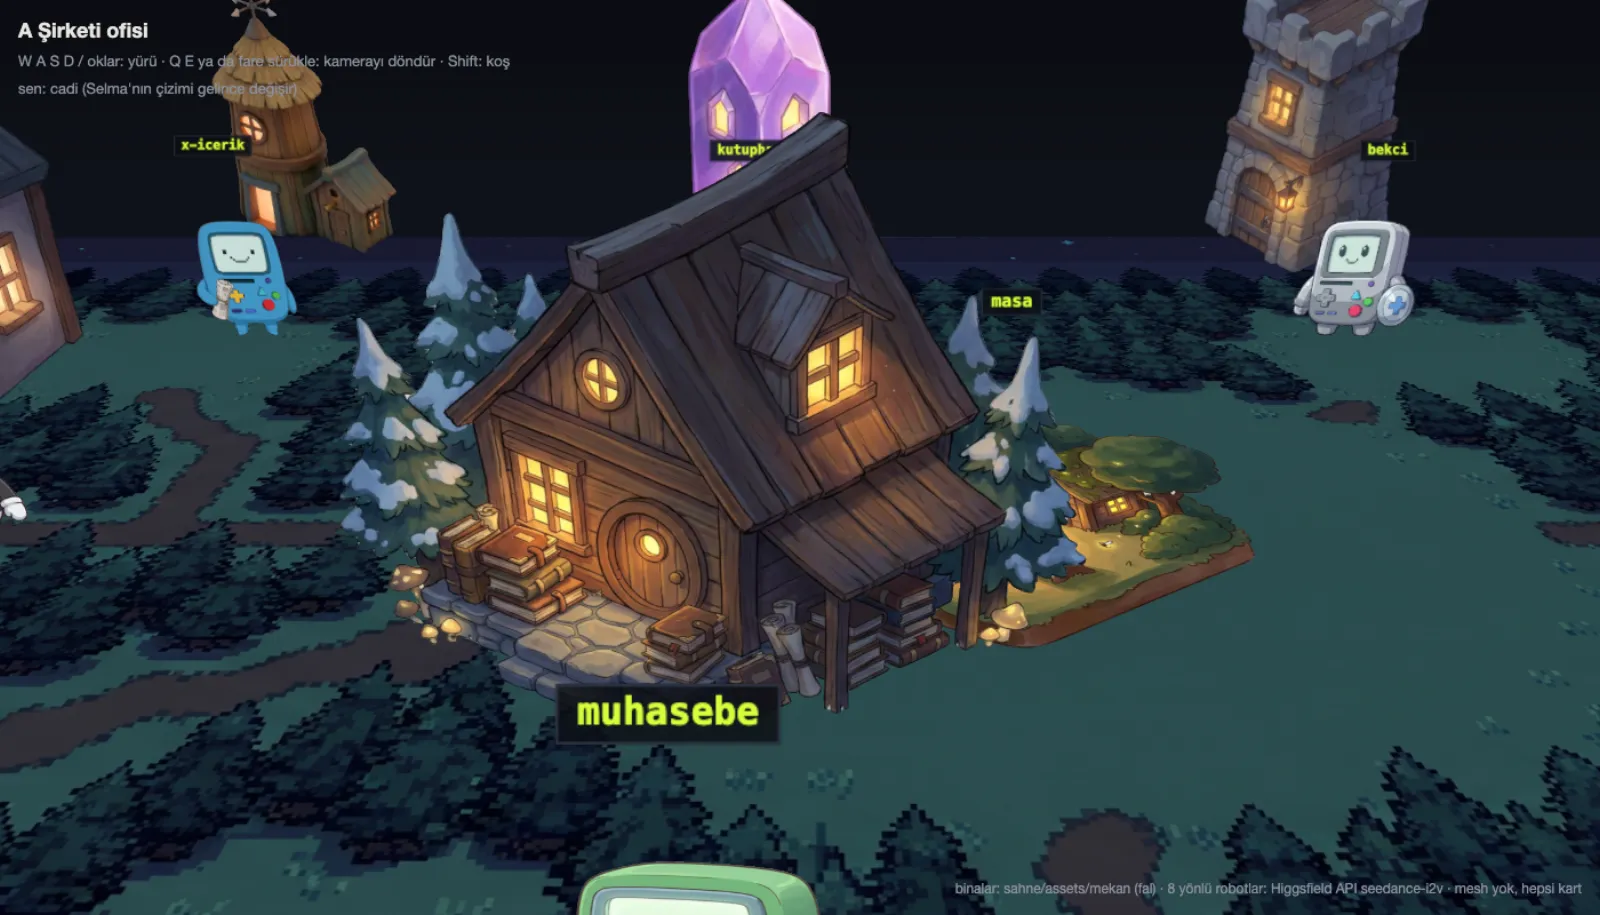
Step 3 — a map you can walk into
Three.js r160. The scene layout was carried over one to one, the buildings and robots stand as cards (billboards), free camera with WASD. No live data yet — just the place.
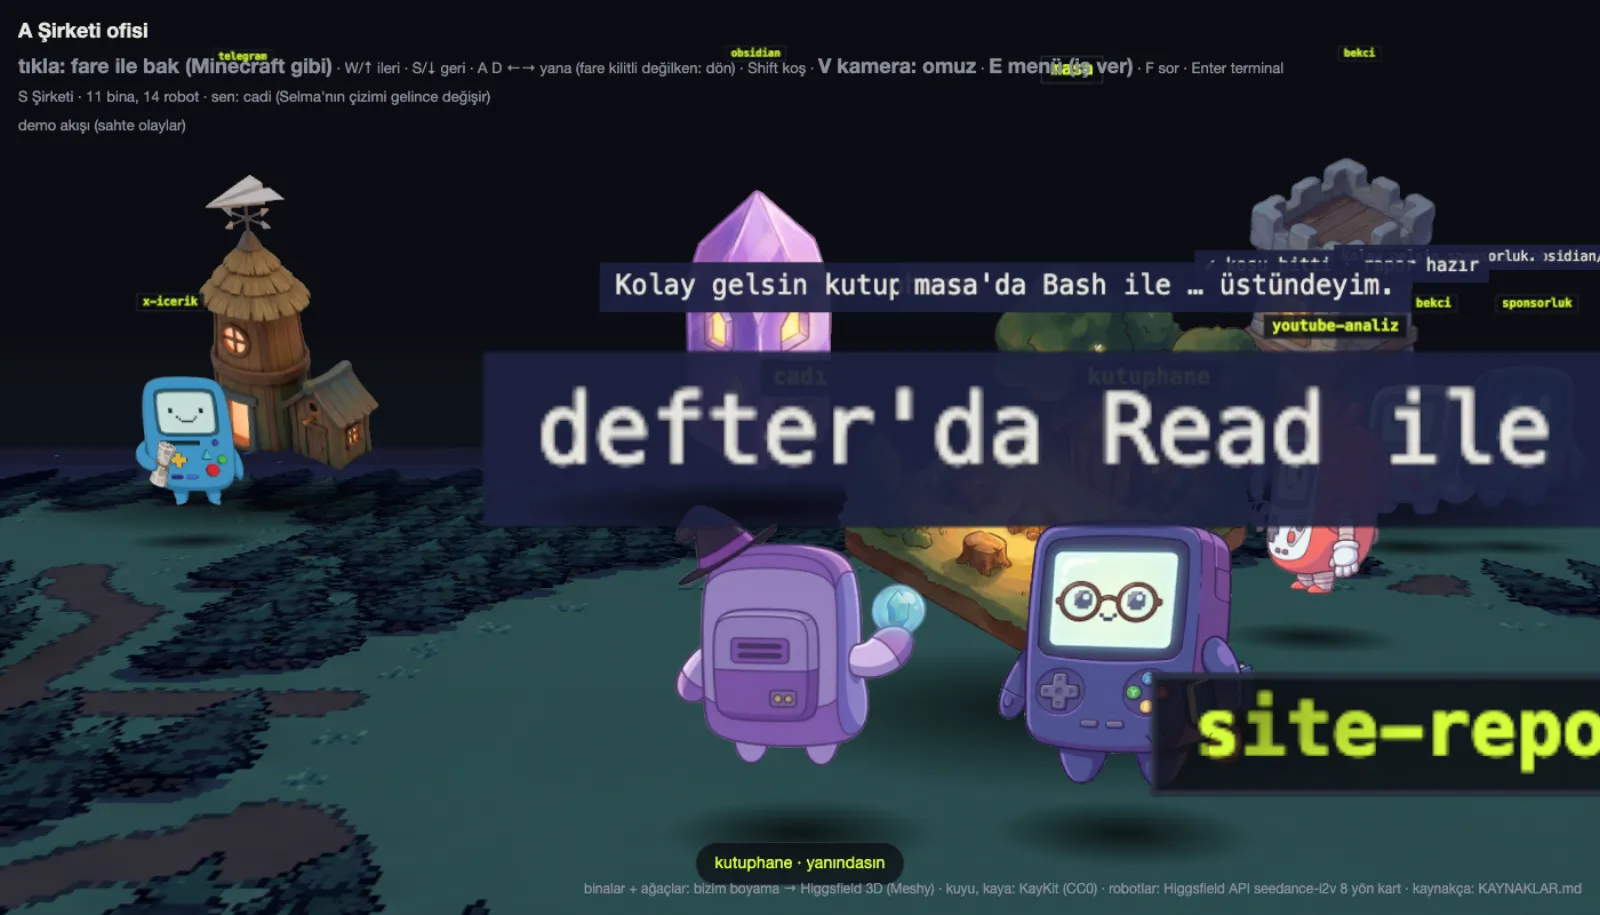
Step 4 — live events
The agents’ hook event stream was wired in. While a team runs, its robot walks to the station with a work bubble above it. The scene now reads from files: 14 robots, 11 buildings.
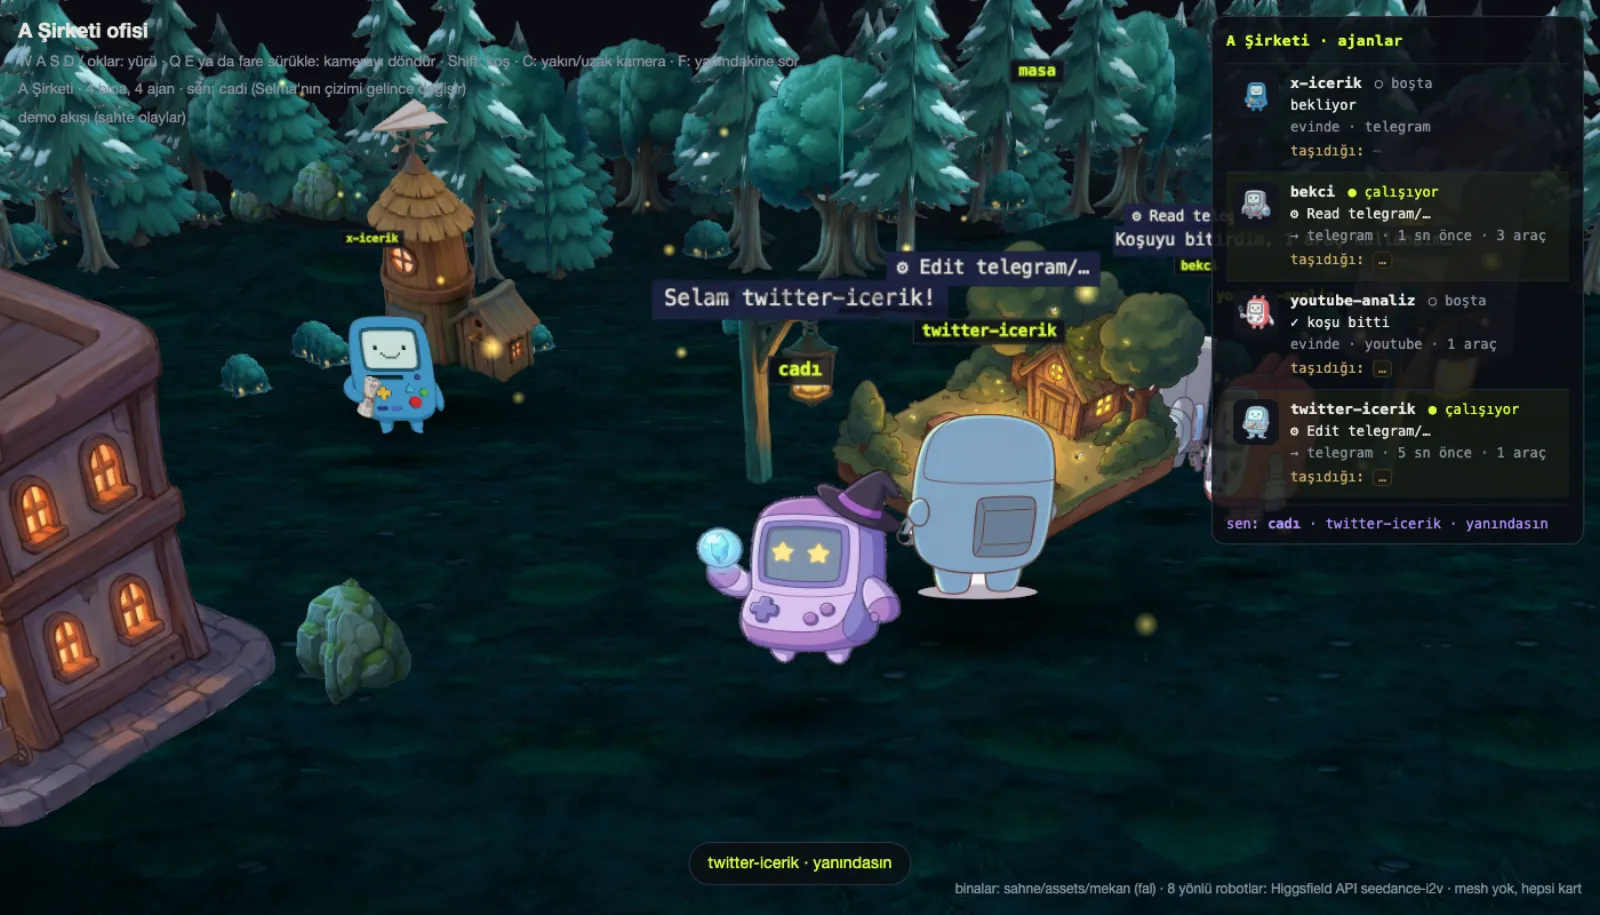
Step 5 — four-angle buildings, forest, panel
Three extra angles were generated for the buildings (12 requests, 0.90 USD), forest props were produced (7 requests, 0.28 USD), the terrain was given some roll, and a contact shadow was placed under every object. The game panel on the right, chat when you get close.
Step 6 — a game camera, but the buildings are still cards
Third-person camera, building collision, correct scale. The first serious block came here: when the camera turned, the buildings turned with it, because they are all cards. They looked flat, and even four-angle cards did not fix it.
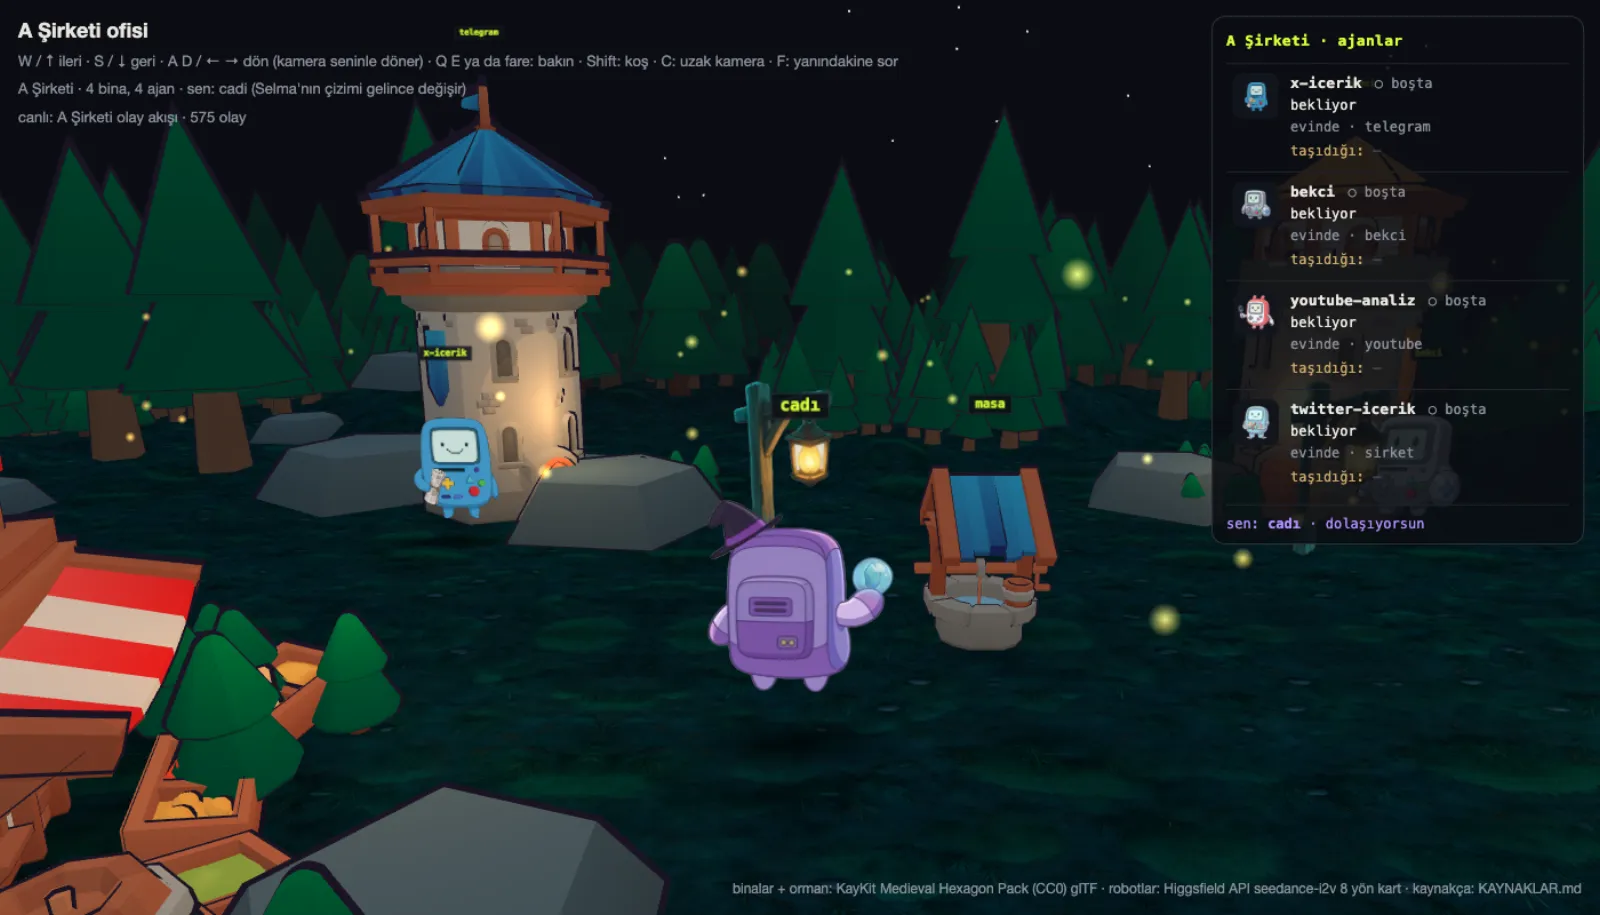
Step 7 — draft 3D: an off-the-shelf CC0 pack
I tried the free route first: glTF buildings from the KayKit Medieval Hexagon Pack (CC0) and an InstancedMesh forest. The mesh problem was solved, but our painted design was completely gone — the village was no longer my village.
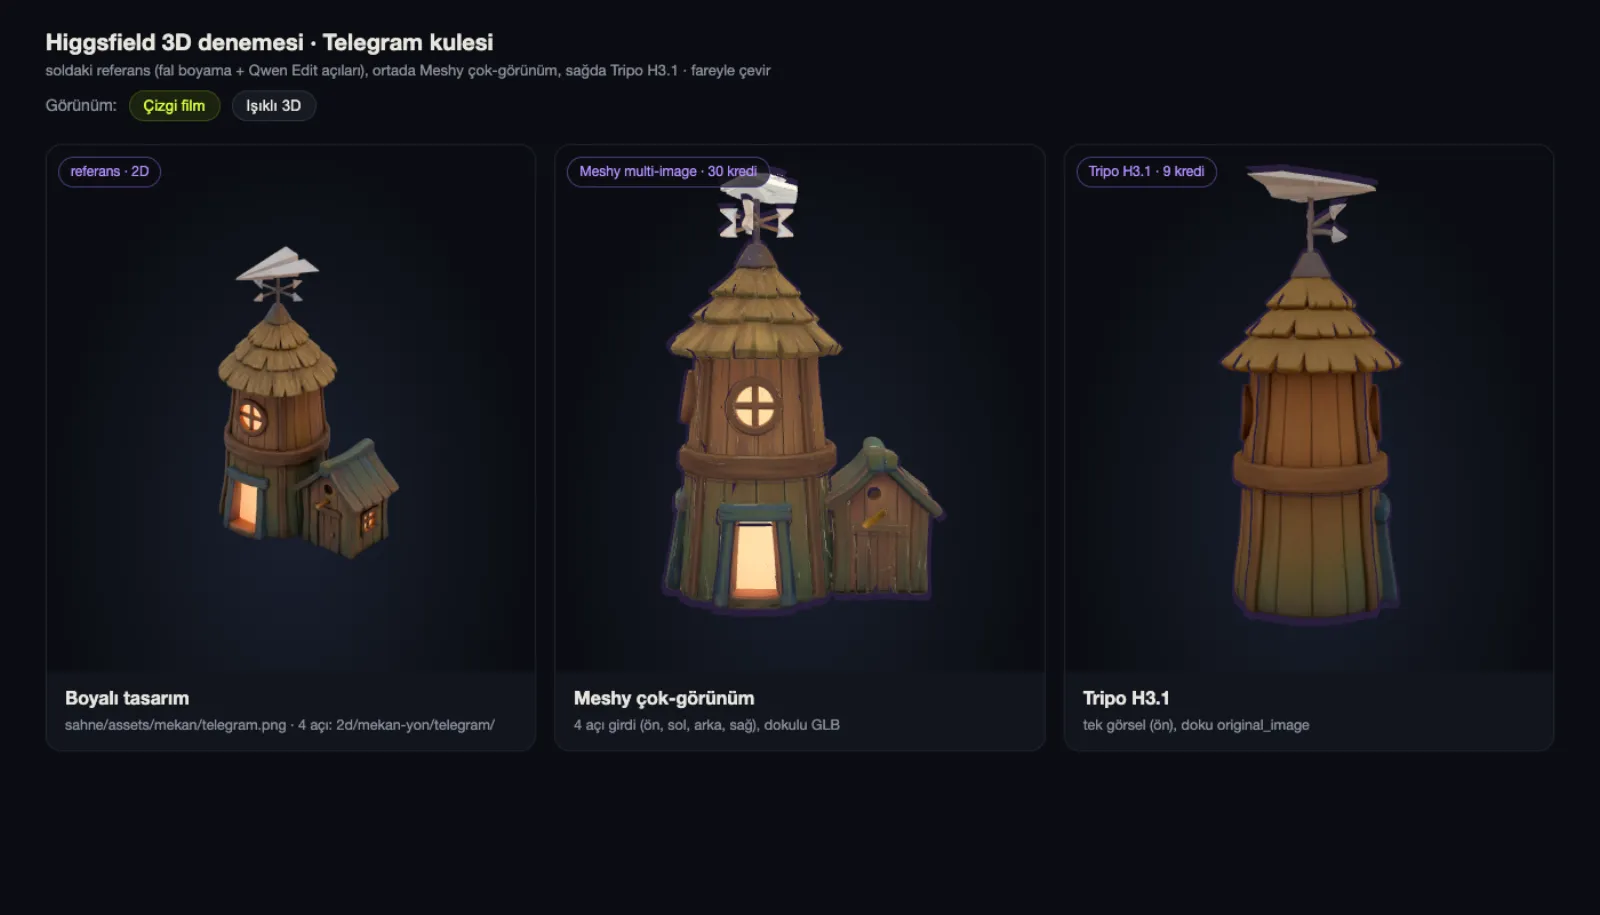
Step 8 — the Higgsfield 3D test: Meshy or Tripo?
I ran the comparison on a single building. Meshy’s multi_image_to_3d (30 credits), which takes four angles of the painted Telegram tower as input, kept the side hut and the light over the door. Tripo H3.1 (9 credits), which generates from a single image, was cheaper but lost the side hut entirely and produced a 41 MB file. Meshy won.
Step 9 — our own designs, now in 3D
Four buildings from four angles, three forest props from a single image. You can rotate the eight models below with the mouse and zoom in with the wheel. The picture on the card is the painting that was fed into the model; click and the 3D version loads.
Smoke from the chimney, a flickering lantern light and fireflies were added. Enter at a building’s door opens that team’s event history; when you get close, the agent talks from its own data — no invented dialogue.
But watching was not enough. In the first live test the agents barely walked at all: the files they read were landing in their own buildings, house = station. If you cannot do anything on screen this is not a game, it is a screensaver. So the E menu arrived: a “give work” box per team that writes to the real queue and starts the run.
Step 10 — the desk, the agent’s question, jumping
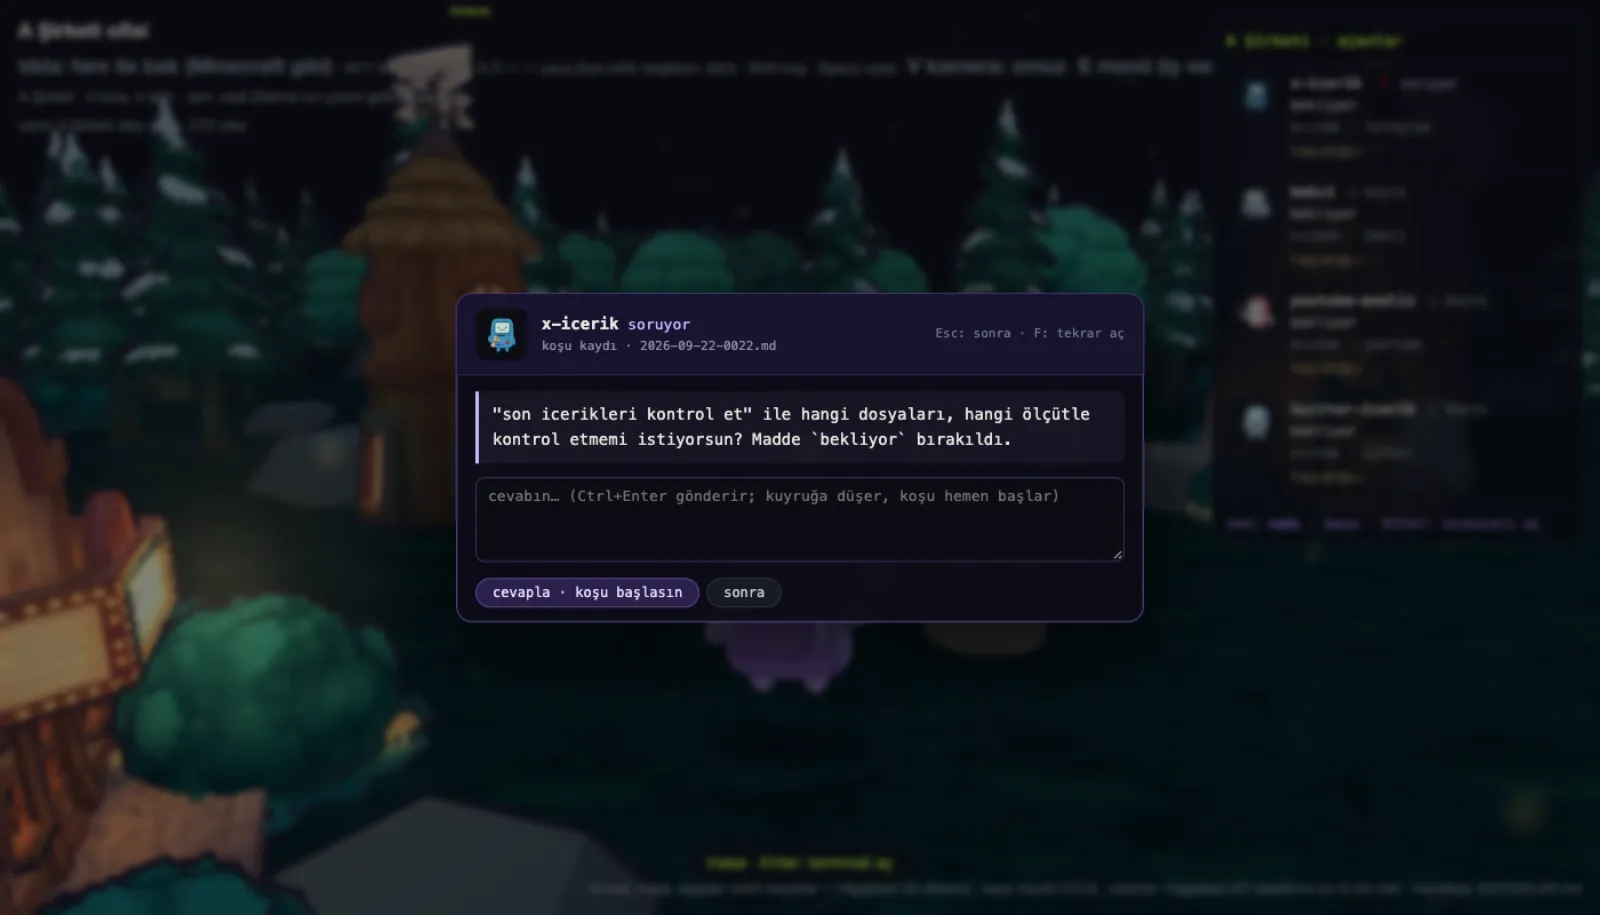
The work station moved to the desk in the middle so that the movement would be visible — and the desk was painted and modelled too (0.075 USD for the image + 30 credits for the model). Then my favourite part: if an agent has something to ask, it walks over to the player, a panel opens, and the answer you give drops straight into that team’s queue as an item and the run starts.
3. The Higgsfield API side: seeing the price before you generate
The part of the API that helped me most is that there is no subscription: a wallet model, auto top-up off, you pay for what you generate. If I need it for a month, I use it that month. The second benefit matters more: the price is known before generation starts. You pick a model, get an estimate, then generate. I turned that into a rule: get an estimate before every generation, write the result in the ledger.
# one key, one line: estimate → generate → ledger
what                                      model                           count     USD
───────────────────────────────────────────────────────────────────────────────────────
x-icerik 4 angles (front/left/back/right) qwen-image-3/edit 2k                7   0.525
5 character rotation videos               seedance-2.5/i2v · 5 s              5   11.56
3 flat cartoon houses (UNUSED)            qwen t2i 2k + seedance i2v        3+3    7.16
3 extra angles for 4 buildings            qwen-image-3/edit 2k               12    0.90
forest props + ground texture             qwen t2i 1k                         7    0.28
work desk                                 qwen t2i 2k                         1   0.075
───────────────────────────────────────────────────────────────────────────────────────
TOTAL                                                                        39   20.50
39 requests, 20.50 USD, one key. One request errored and was not charged. For comparison: the same five-second rotation video would have cost an estimated 0.298 USD per 5 s with Kling 2.5 Turbo Pro.
The ceiling: the most expensive lesson I paid for
The third row in the table is 7.16 USD and it was never used. I generated three flat cartoon houses, then realised the real houses in the scene were already painted. The right order was: look at what is in the scene first, then generate. Also, the Seedance price does not come back from the API; because I built the formula assuming 720×720 I thought it was 1.30 USD, and when the real resolution turned out to be 960×960 it became 2.31 USD per video.
Higgsfield 3D: from subscription credits, not from the API
3D generation is not on the API side; I spent it from my Higgsfield subscription credits. That way those credits did not go to waste either. In total 249 credits, the balance went from 1087 to 838.
what                                  model                        credits
──────────────────────────────────────────────────────────────────────────
telegram tower, from 4 angles (test)  Meshy multi_image_to_3d           30
telegram tower, one image (dropped)   Tripo H3.1 image_to_3d             9
bekçi, sinema, şirket · 4 angles each Meshy multi_image_to_3d       3 × 30
tall pine, leafy tree, bush           Meshy image_to_3d             3 × 30
work desk, from one image             Meshy image_to_3d                 30
──────────────────────────────────────────────────────────────────────────
TOTAL                                                                  249
The GLBs that came out are 4–5 MB per model. The versions you see on this page were brought under 400 KB with Draco compression and 1024 px textures — otherwise eight models would not fit in one article.
4. The packs I used
- KayKit Medieval Hexagon Pack 1.0 (Kay Lousberg) — CC0. The buildings and forest in the draft round; the well and rocks in the final state.
- Three.js r160 — MIT. Scene, GLTFLoader, InstancedMesh, MeshToonMaterial.
- rembg (u2net) — MIT. Background cleanup for the sprite frames and the props.
- FFmpeg 8.1 — LGPL/GPL. Cutting the eight frames out of the rotation video.
- pixel-agents — MIT. The backup pixel characters in the scene.
CC0 packs I found while researching, did not use this round, but noted down:
- Kenney Fantasy Town Kit — 160+ modular pieces.
- Quaternius Medieval Village MegaKit — 300+ pieces; GLB via poly.pizza.
- KayKit Character Pack: Adventurers — rigged, animated characters. My robots stayed as cards; this is here for comparison.
5. The prompt and the mistake kit
Every item in the prompt below came out of a mistake that actually happened that day. If you are going to turn your own 2D scene into 3D, I am leaving it exactly as it is so you do not fall into the same traps — ready to paste into Claude Code (or Codex).
I have a 2D agent scene (canvas, one front-facing PNG per agent, painted PNG buildings). Turn
it into a 3D game you can walk around in, with Three.js. Rules:

1. Keep the characters as cards (billboards) but make them 8-directional: cut 8 frames out of
   each character's rotation video, clean the background, pick the frame by movement angle.
   Do not guess the frame→direction mapping; produce a contact sheet and write down which
   frame faces left/right by SEEING it.
2. Do NOT make the buildings and trees billboards. A card building turns with the camera and
   looks flat. Buildings and trees must be real meshes: first drop in a CC0 pack (KayKit /
   Kenney), then turn my own painted designs into models with image-to-3D. If the painted
   design has 4 angles (front, left, back, right) use the multi-view model; generating from a
   single image is cheaper but loses detail.
3. Make the camera third person: the mouse turns the camera direction, the character turns
   towards where it is going (press sideways and the side frame should show); the camera turns
   faster than the character so the turn is visible. One key for over-the-shoulder / top-down /
   first-person. Mouse/Q/E for a temporary look around, and the camera swings back when you
   walk. A free orbit camera does not feel like a game.
4. Sitting on the ground: a contact shadow under every object, bury the buildings 10-15 cm into
   the ground, bushes/rocks at their base. A card with no shadow looks like it is floating.
5. Scale: if the character is 1 unit, a building is 2.5-3 units. Camera low and close
   (2.5 units back, 1.5 up).
6. Live data: read the agents' hook event stream; on PreToolUse the agent walks to the station
   with a work bubble above it, on Stop it goes home. Game panel on the right: who is working,
   which tool, what it is carrying. When you get close the agent states its status from ITS OWN
   data, no invented sentences.
7. Small signs of life: smoke from the chimney, a flickering lantern light, fireflies, stars.
   Cheap, but it makes it a game.
8. Enter at a building's door: open that team's terminal (event history).
   The E key opens the company menu: a "give work" box per team (writes to the real queue and
   starts the run), the waiting queue, the last report. Watching is not enough; without giving
   work it is not a game, it is a screensaver. An agent that takes a job should walk to the
   player first, and come back with the report when the run finishes. An agent working in its
   own building never walks; move the work station to the desk in the middle so movement shows.
9. Get a price estimate before every API generation and write it in the ledger; do not call the
   API in test rounds, code only. Write every pack, model and cost into one KAYNAKLAR.md.
10. Keep every intermediate version as its own file (v1, v2, …) and list the links; this will be
    told step by step.
Which item came out of which mistake
- 1 — I wrote the frame→direction table from assumption; pressing right turned the character left.
- 2 — The first office was all billboards: “the buildings turn with me, they’re flat”. Even four-angle cards did not fix it; it needed meshes.
- 3 — The free orbit camera made it “not feel like a game”; tank controls plus a follow-from-behind camera gave it the feel.
- 4 — Cards with no shadow looked like they were floating. Burying them, shadows and plants at their base fixed it.
- 5 — In the first mesh round the market building came out six times bigger than the character.
- 6 — A static scene is boring; the real interest is seeing the agents at work. Not invented dialogue, sentences from event data.
- 8 — “We can’t do anything on screen, we should be able to give work, the agents should come to us.” The E menu, the real queue and moving the station to the desk came out of that.
- 9 — The Seedance price does not come back from the API; the wrong assumption made a difference of 1 USD per video. Three houses went to waste (7.16 USD).
- 10 — If the versions are lost you cannot show “from where to where”.
6. Sources
- Higgsfield API — the image and video models I used, one key.
- docs.higgsfield.ai — endpoints, price estimates, the model list.
- github.com/selmakcby/a-sirketi — the skeleton of the agent company running inside the game.
- The video itself · the channel is @selma.builds
I am not distributing the office game’s own source code. But the three things above — the packs I used, the order of the steps and the whole prompt — are enough to build the same thing in your own scene. If you like the video say so in the comments; if there is interest I will open the code as well.
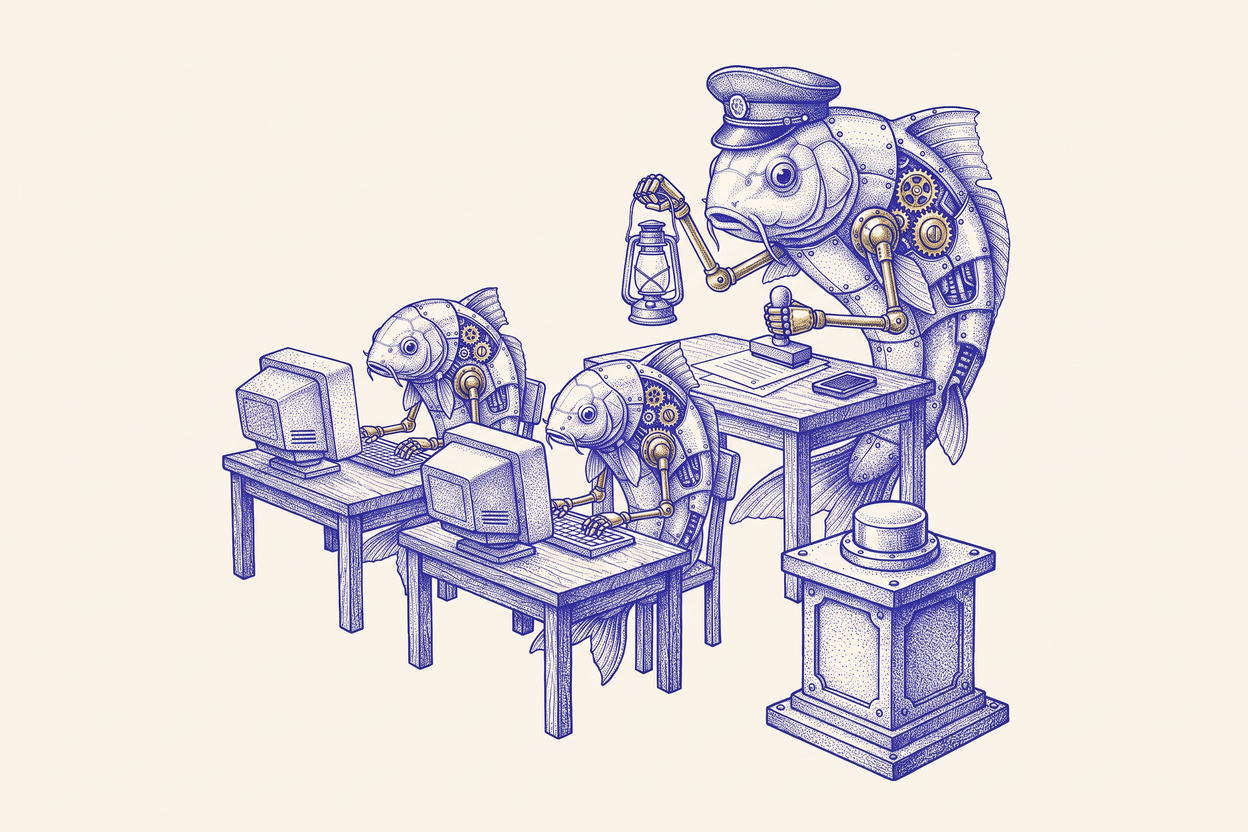 A Şirketi — Three Agents, One Guard, One Closed Loop: The Skeleton of My AI Company, on GitHub